

I’ve shot travel photography professionally for 30 years, and aperture priority is the mode I’m in 90% of the time I press a shutter. I’ve used it at golden hour on a Skye headland, in a Marrakesh souk in low light, and on 400mm of long lens framing puffins on an Icelandic clifftop. More than any other single tweak in the menu, it’s the one that fixes bad travel photos.
I still shoot a Canon R5 with a variety of lenses (see my full photography gear list here). Canon discontinued this camera in 2026, and most of my lenses are very long in the tooth, but I have no need to upgrade. They do everything I need on the road, and chasing the gear cycle for the sake of the cycle isn’t something I’ve ever felt the pull to do.
The example shots in this guide span years of travel and more than one body: some are recent R5 frames, plenty come off the Canon 6D I shot for years before it, across a clutch of EF lenses (the 16-35mm and 17-40mm f/4L wide zooms, the 70-200mm f/2.8L, the 100-400mm, the 100mm macro), with one or two off a Panasonic Lumix. Every shot is captioned with the body, the lens, the aperture, the shutter speed, the ISO, and any exposure compensation I dialled in, so you can read the settings the same way I would in the field.
This is the guide I wish someone had handed me when I was still hovering between full Auto and Manual. Aperture priority is the camera setting that closes that gap, and once you understand the trade-offs, you’ll wonder why you spent so long fighting Auto.
Quick Take: What Aperture Priority Does, and When to Use It
Aperture priority is a semi-automatic exposure mode (Av on Canon, A on Sony, Nikon, and Fujifilm) where you set the aperture and the ISO, and the camera works out the shutter speed for a correctly exposed photo.
It’s the right default for almost all travel photography, because aperture is the dial you actually want to be thinking about: it controls how much of your scene is in sharp focus, from a sliver of a face at f/1.8 to a sweep of mountain at f/11. Switch to it once, set Auto-ISO with a minimum shutter speed, and you’ll get cleaner exposures faster than you ever did in Auto, while keeping creative control over the depth of your image.
Canon EOS 6D with EF 17-40mm f/4L at 21mm. f/7.1, 2s, ISO 100, +0.7 EV. Diamond Beach, Jökulsárlón, Iceland.
What Aperture Priority Mode Actually Does
Every photograph is the product of three things: the aperture (how wide the lens iris is open), the shutter speed (how long the sensor is exposed to light), and the ISO (how sensitive the sensor is to that light). The relationship between those three is the exposure triangle, and once you’ve got your head around it the rest of photography starts to make a lot more sense.
Aperture priority hands you direct control over one corner of the triangle and lets the camera handle the other two. You set the aperture (and the ISO, or let Auto-ISO handle it), the camera meters the scene, and it sets a shutter speed that produces a correct exposure. If you change the aperture, the camera changes the shutter speed to compensate. The exposure stays the same; what changes is the look of the photo.
Aperture is the most useful of the three to control directly, for two reasons.
The first reason is depth of field. A wide aperture (a small f-number like f/1.8 or f/2.8) gives you a shallow depth of field: only a thin slice of the image is in sharp focus, and the background falls away into soft blur. A narrow aperture (a big f-number like f/11 or f/16) gives you deep depth of field: more or less everything from your boots to the horizon is sharp. The decision between those two is usually the most important creative choice you make in a photo, and aperture priority puts it directly in your hands without making you also juggle the shutter speed.
The second reason is shutter speed isn’t usually the thing you care about. As long as the shutter is fast enough to avoid camera shake or subject blur, the exact number is irrelevant. The camera can pick it, and as long as you’ve set sensible guardrails (more on Auto-ISO below), it’ll pick well.
You give up direct shutter control in aperture priority, which is why it’s the wrong mode for sport, action, or anything where freezing motion is the load-bearing requirement. For everything else, which is most of travel photography, it’s the right tool.

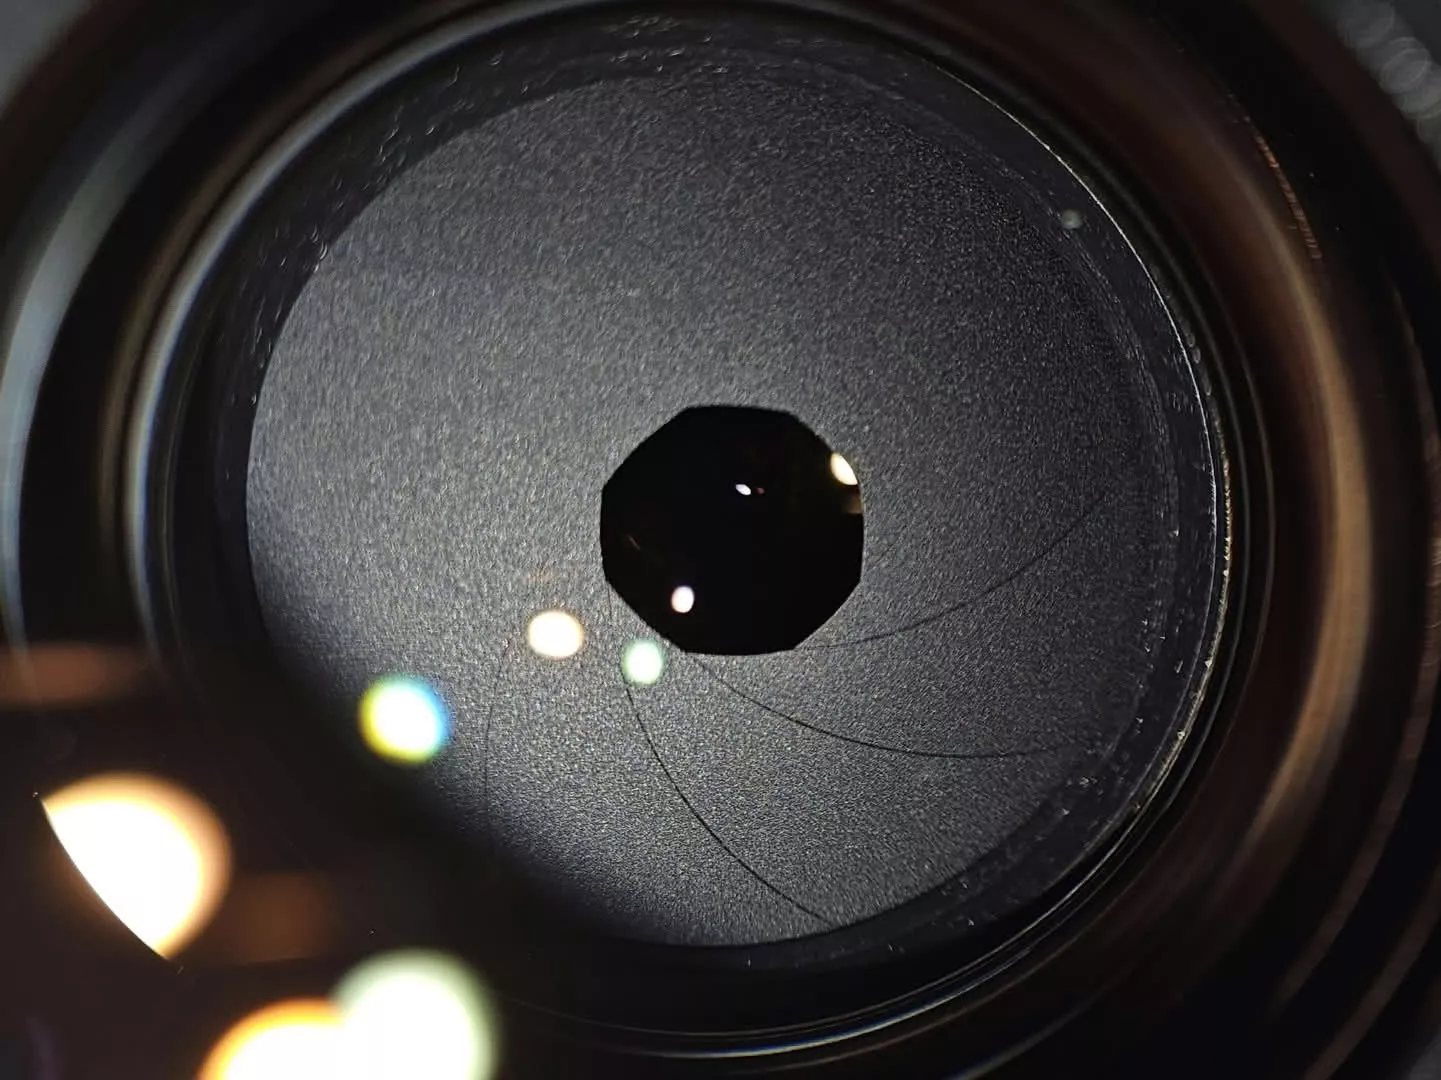
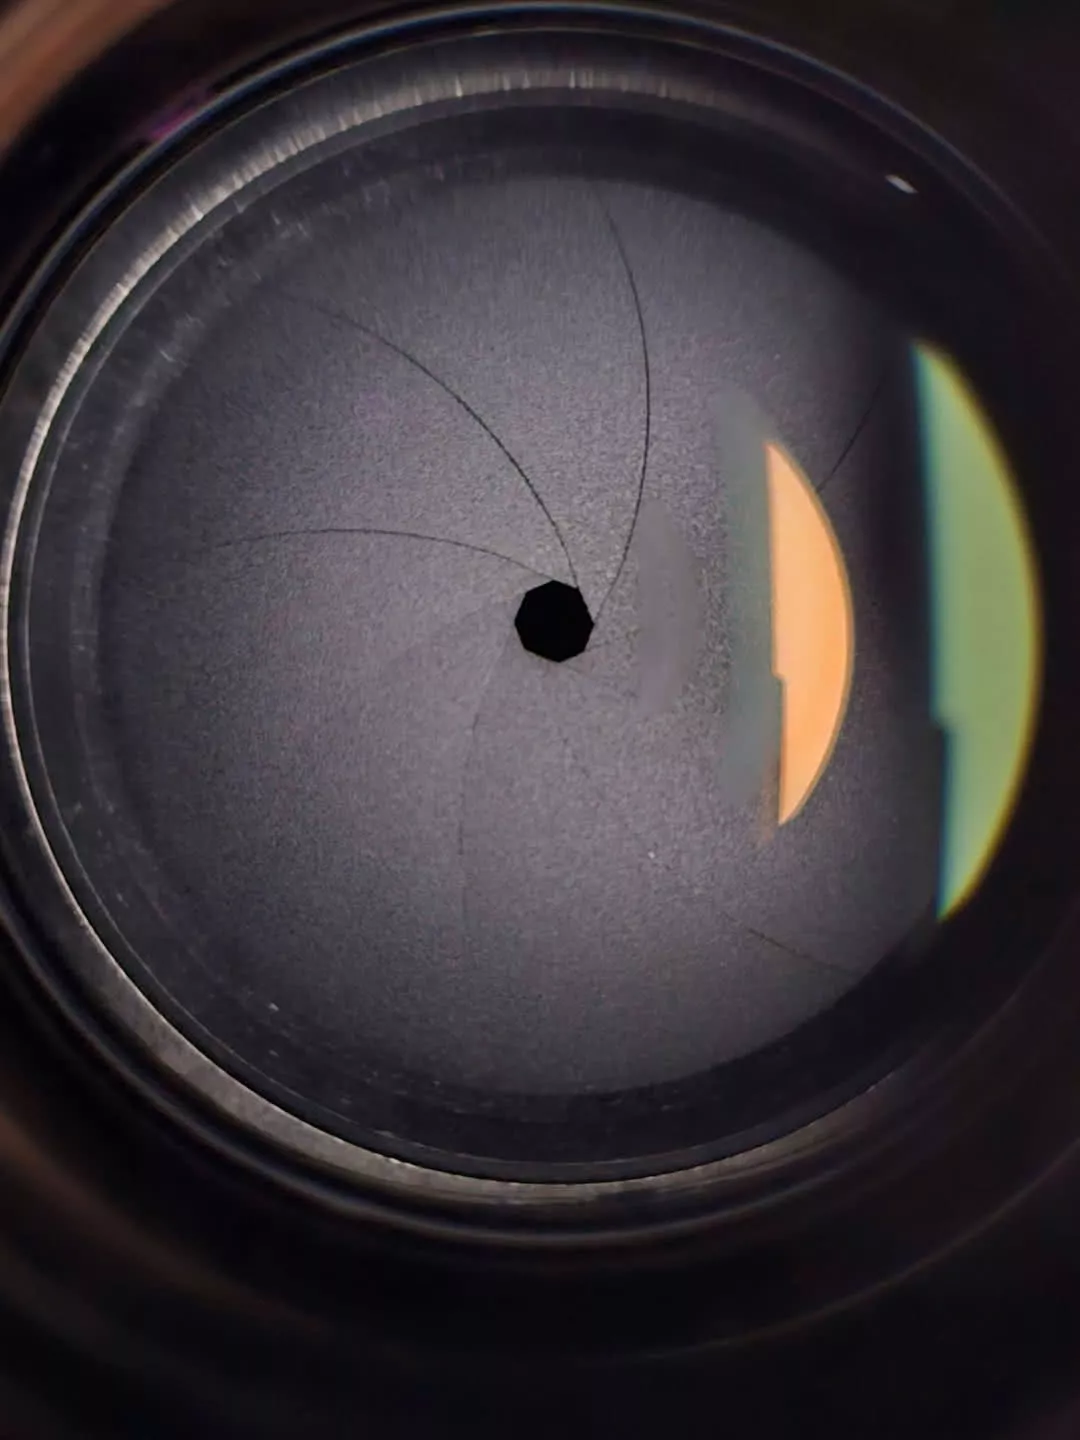
The aperture inside my EF 100mm f/2.8 Macro at f/2.8, f/8 and f/32. As the f-number climbs, the physical opening shrinks.
How to Switch Your Camera to Aperture Priority
Every modern interchangeable-lens camera has aperture priority, and on most of them it’s a quarter-turn of the mode dial away. The naming convention varies by brand, which is the only reason this section exists: Canon calls it Av, while Sony, Nikon, and Fujifilm all call it A. The behaviour is identical across all four; only the controls differ.
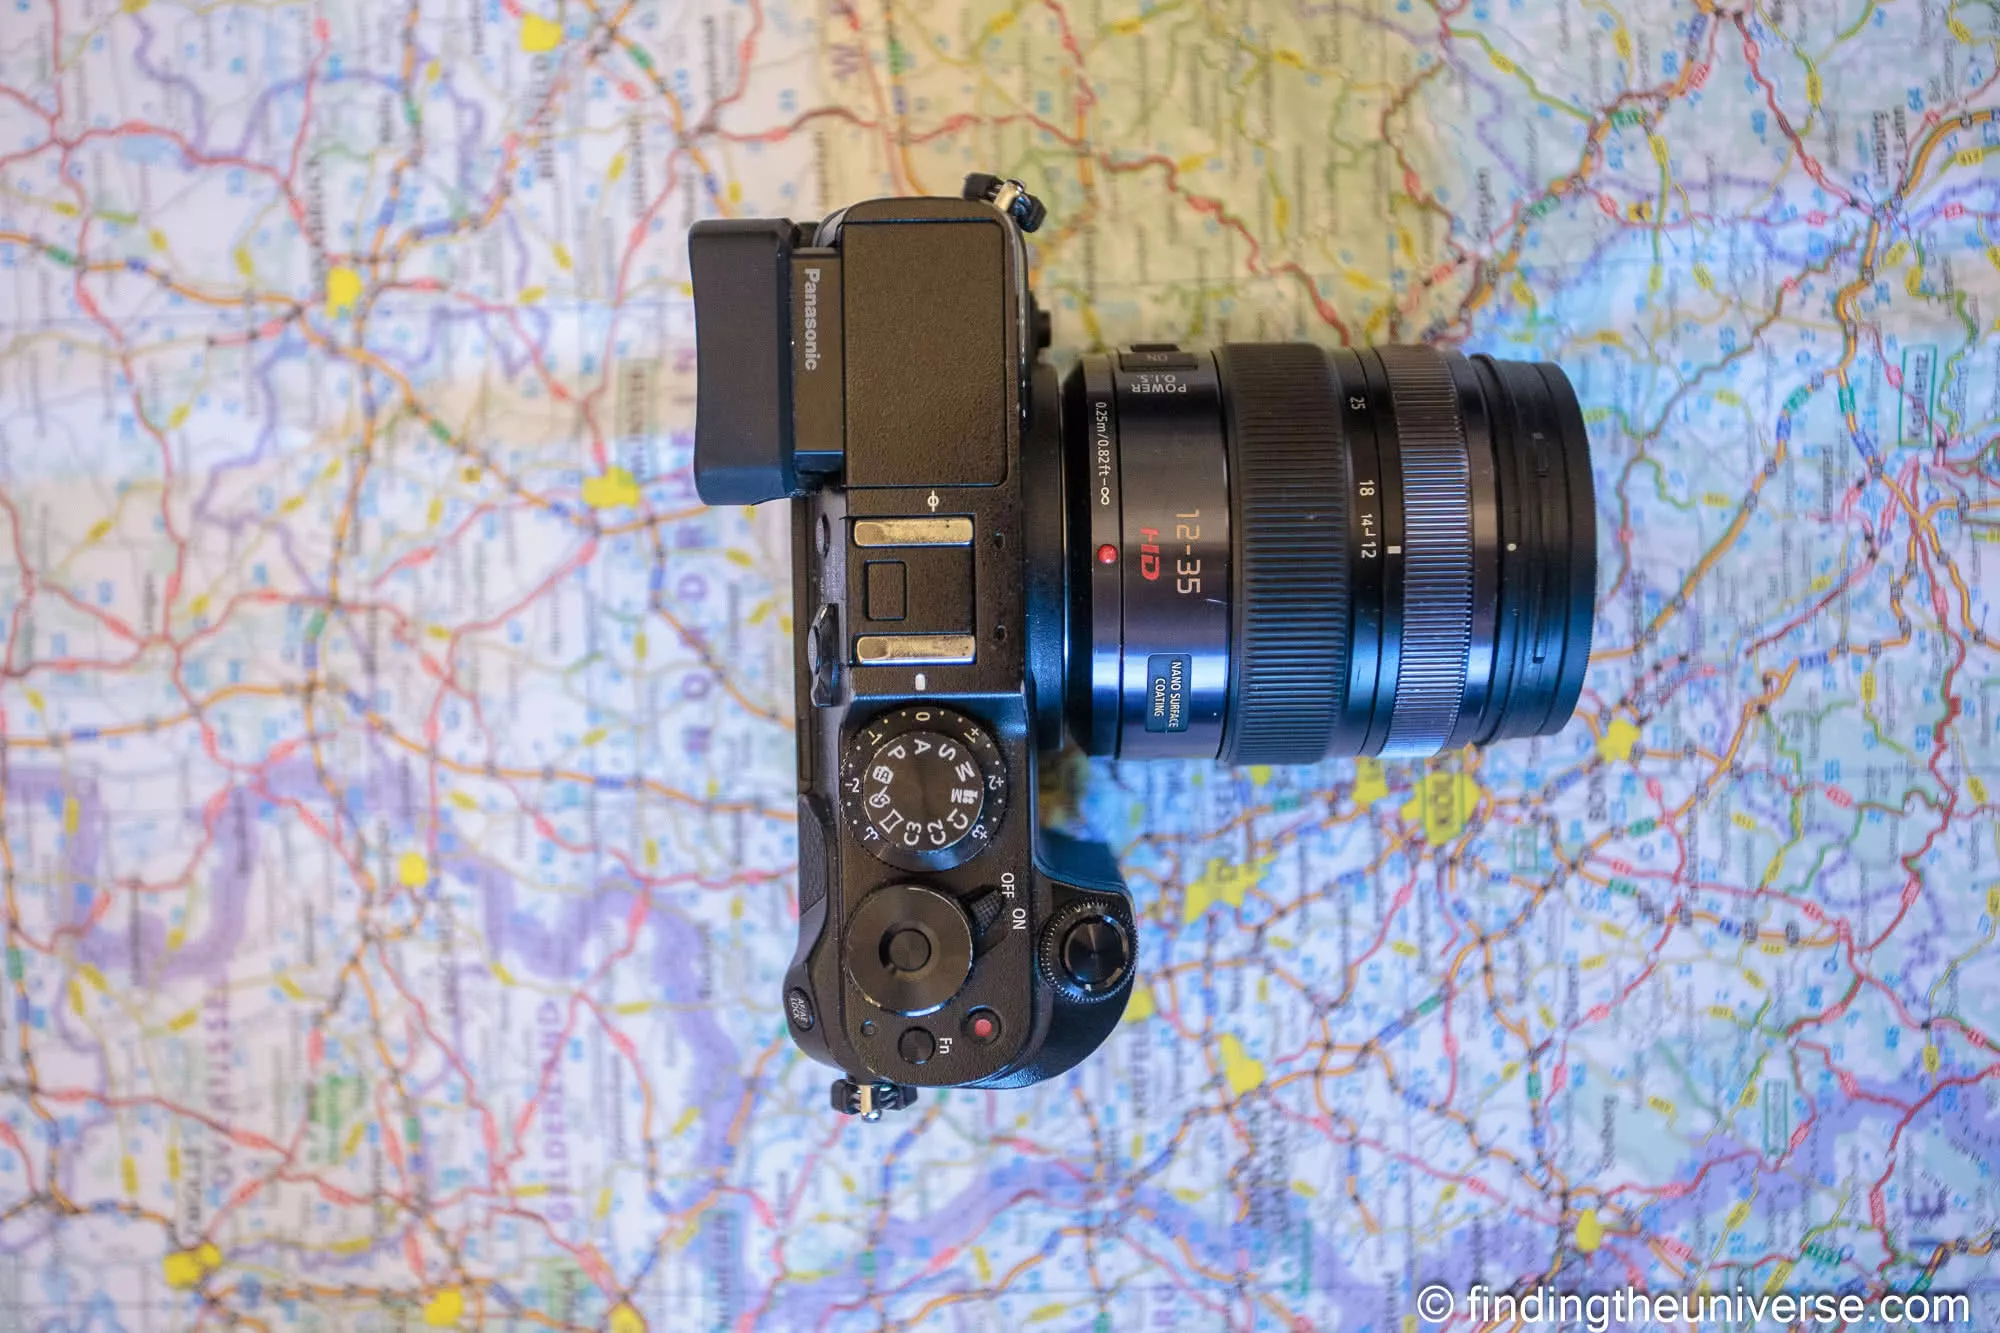
Aperture priority is the A position on Sony, Nikon and Fujifilm, shown here on a Panasonic Lumix where the A works exactly the same way. Only Canon calls it Av. Presumably because they like to be different.
Canon: Av
On Canon, aperture priority is marked Av, and how you select it depends on the body. The R5, R5 Mark II, R6 Mark II and R3 have no printed mode dial: you press the MODE button on the top plate and turn the main dial until Av shows on the top screen.
The R8, R10, R50 and the DSLRs going back through the 5D and Rebel lines have a physical mode dial you turn to the Av position instead. Either way, once you are in Av the aperture is set with the main dial behind the shutter button. The official walkthrough is on Canon’s online manual for the R5; the same Av behaviour runs across the EOS R line.
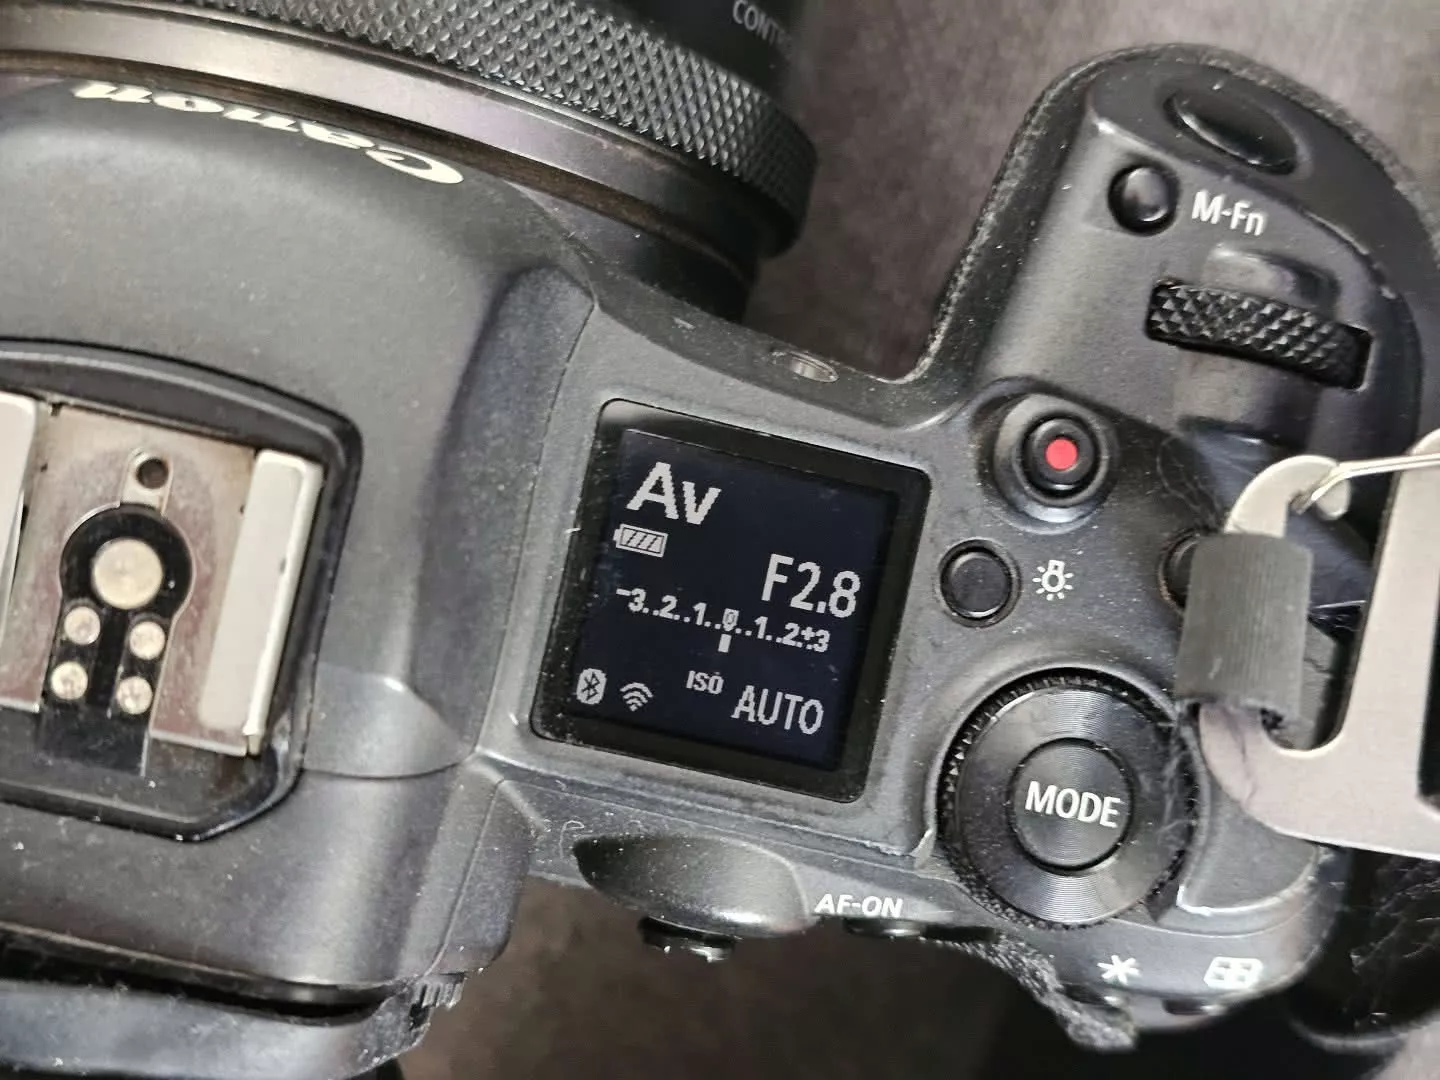
My Canon R5 in Av mode, the top screen reading Av at f/2.8 with ISO on Auto. The R5 has no printed mode dial; you set Av with the MODE button.
Once you’re in Av, the exposure compensation dial (a separate wheel on the top right of most R bodies, or the rear thumb wheel on the entry-level ones) lets you nudge the exposure brighter or darker. We’ll come back to that. Av on Canon also retains your last-used Auto-ISO settings, so if you set those up once they’ll be there next time.
Sony: A
Sony Alpha bodies (A7 IV, A7R V, A7C II, A6700, ZV-E10 II) put aperture priority at the A position on the mode dial. Turn the dial to A, and the aperture is controlled by the front or rear command dial depending on your body and how it’s customised by default. Sony’s A7 IV help guide spells out the default control assignments; if you’ve remapped them, check whichever dial currently shows the aperture in your viewfinder.
Sony’s exposure compensation is either on a dedicated locking dial on top of the body (the A7R V, A1, A7 IV come with one), or assigned to a function button, depending on the model. If you bought your Sony any time in the last five years it’ll have one of these options; older A7-series bodies have it on a different wheel.
Fujifilm: A (And the X-T Versus X-S Split)
Fujifilm splits its current line in two, which trips up almost everyone the first time. On the X-T5, X-T50, X-H2, X-H2S, X100VI, and the GFX bodies, there is no PSAM mode dial at all. Instead, you set the shutter-speed dial on top of the camera to A and turn the aperture ring on the lens to the f-stop you want. That puts the camera in aperture priority. If your lens doesn’t have an aperture ring (a handful of Fuji XC lenses don’t), you control aperture with the front command dial.
On the X-S20 and X-S10, Fujifilm uses a conventional PSAM mode dial like Canon or Sony, and aperture priority is the A position. Aperture is then set with the front command dial, or the lens aperture ring if your lens has one. Either way, the name of the mode is the same on every Fujifilm body, even if the route into it isn’t.
If you’re not sure which layout your Fujifilm has, count the dials on top of the camera. Two big ones for shutter speed and ISO with no PSAM letters means twin-dial; one PSAM dial with letters means X-S layout. Fujifilm’s X-T5 manual covers the twin-dial setup; the X-S20 manual covers the PSAM version.
Nikon: A
Nikon Z-series cameras (Z8, Z9, Z6 III, Z5 II, Zf, Z50 II, Z fc) put aperture priority at the A position on the mode dial. Turn the dial to A, and aperture is controlled by the sub-command dial on the front of the grip. Nikon’s Z8 exposure manual walks through it; the same convention runs through the rest of the Z-series.
If you’re shooting an older Nikon DSLR like the D750 or D850, A is still A on the mode dial, but the aperture is on the front sub-command dial by default. On the Df and Zf, which have retro-style dedicated dials for shutter speed and ISO on top of the body, aperture is on the lens ring with G-type lenses controlled by the command dial.
Aperture, Depth of Field, and the Look of Your Travel Photos
The reason aperture priority is the right travel-photography default is depth of field. Depth of field is the slice of your scene that’s in focus, measured front-to-back from the closest sharp point to the farthest sharp point. Wide aperture, shallow slice. Narrow aperture, deep slice. Once you internalise that, every other decision in aperture priority gets easier.
The f-stop scale runs in full stops from roughly f/1.4 (very wide, almost no depth of field) through f/2, f/2.8, f/4, f/5.6, f/8, f/11, f/16, and up to f/22 (very narrow, almost everything sharp). Each full stop either doubles or halves the amount of light hitting the sensor. Most lenses have intermediate one-third and one-half stops too, so you’ll see numbers like f/3.5 and f/6.3 on the dial. The behaviour is continuous; the named full stops are just landmarks.
Here’s how that translates to actual travel photos.
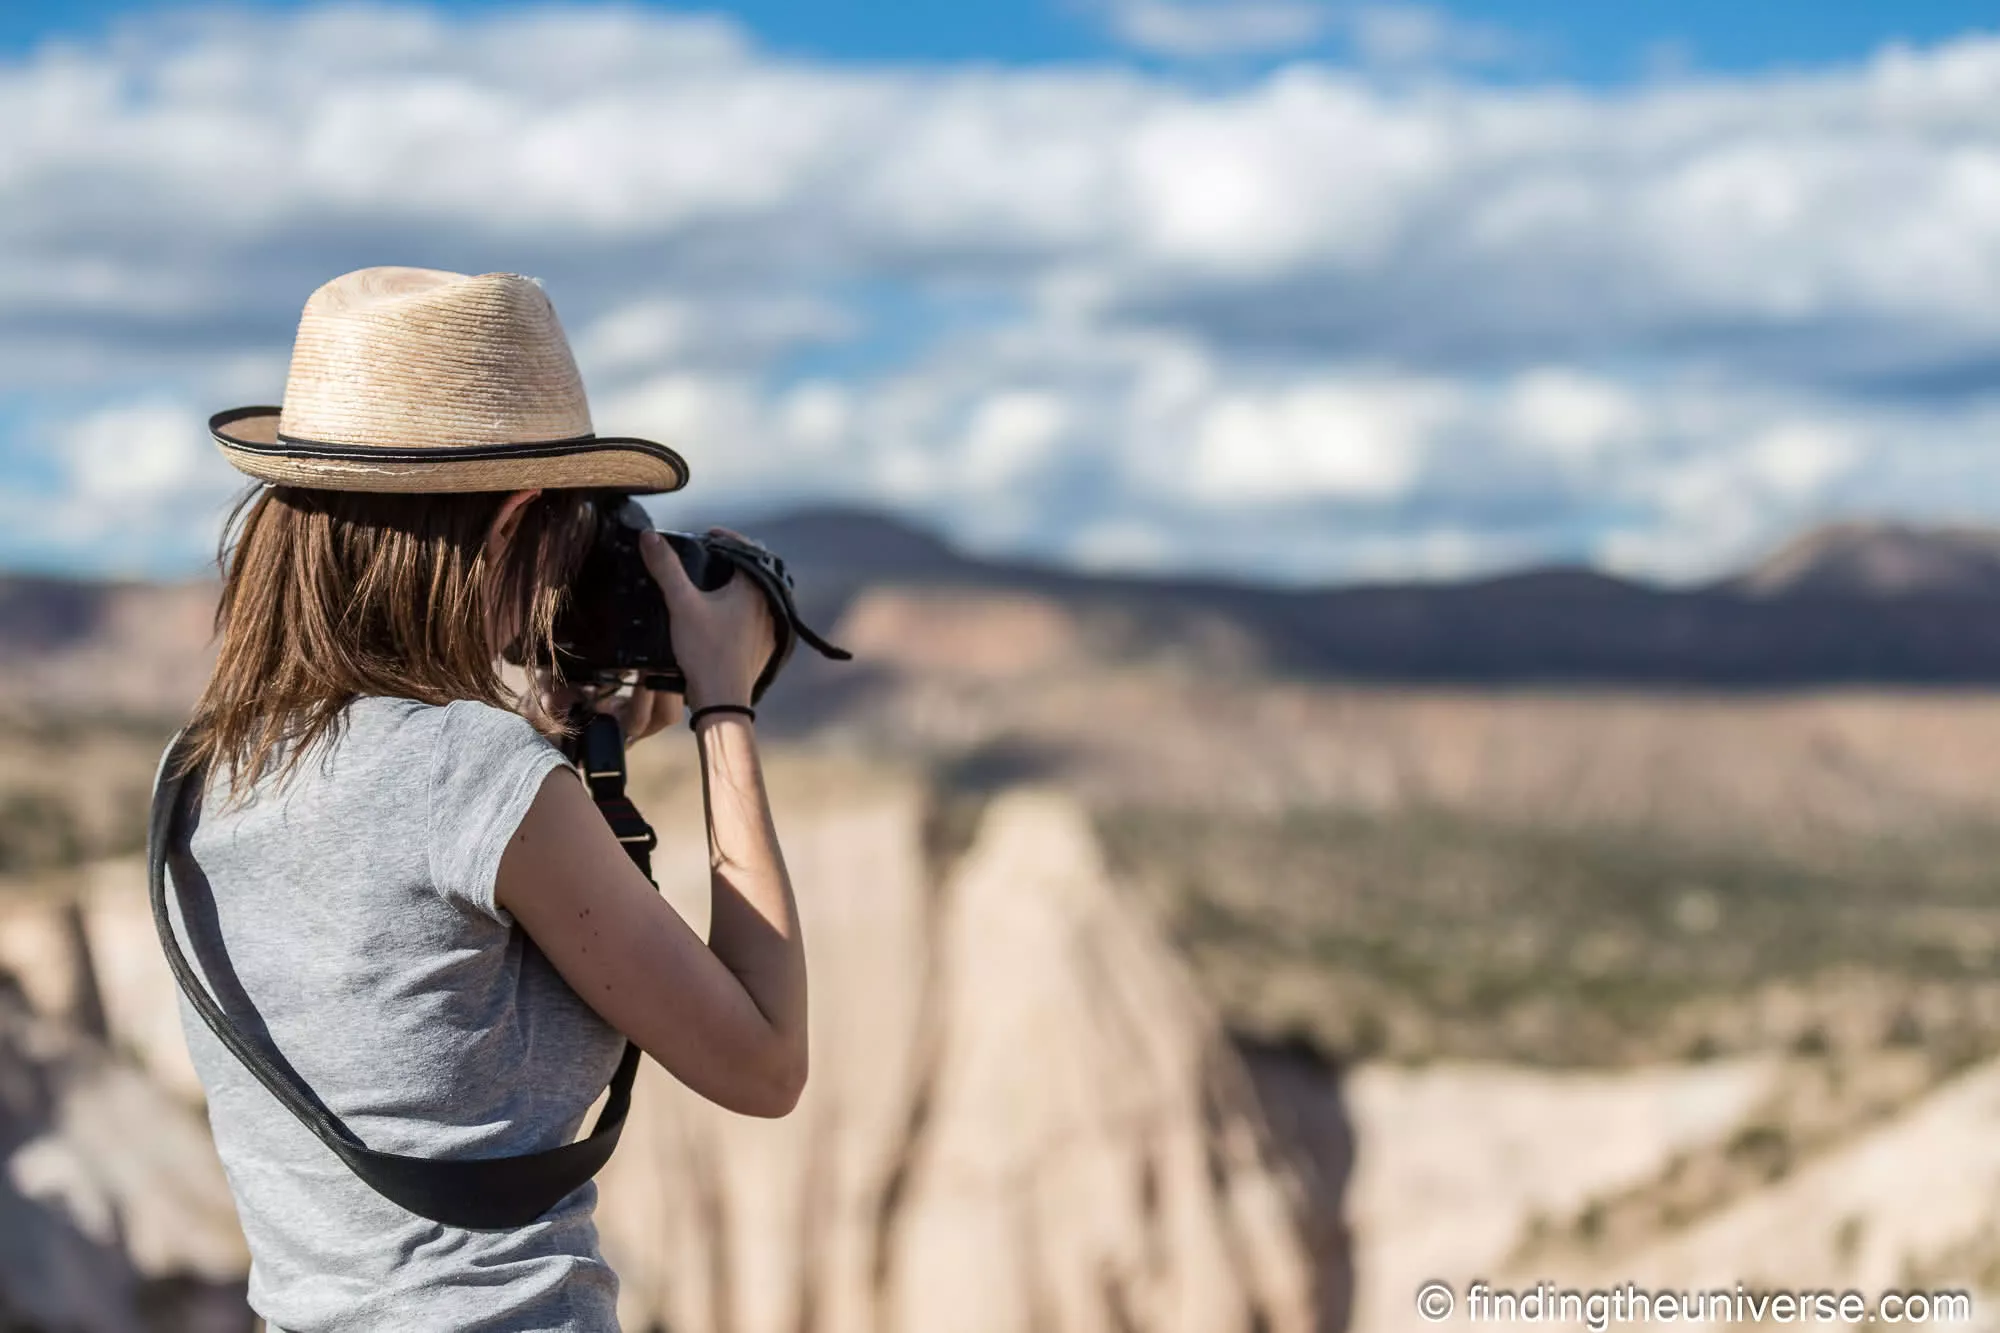
Canon EOS 6D with EF 70-200mm f/2.8L IS II at 70mm. f/2.8, 1/1600s, ISO 100. At f/2.8 the canyon behind the subject falls away into soft blur.
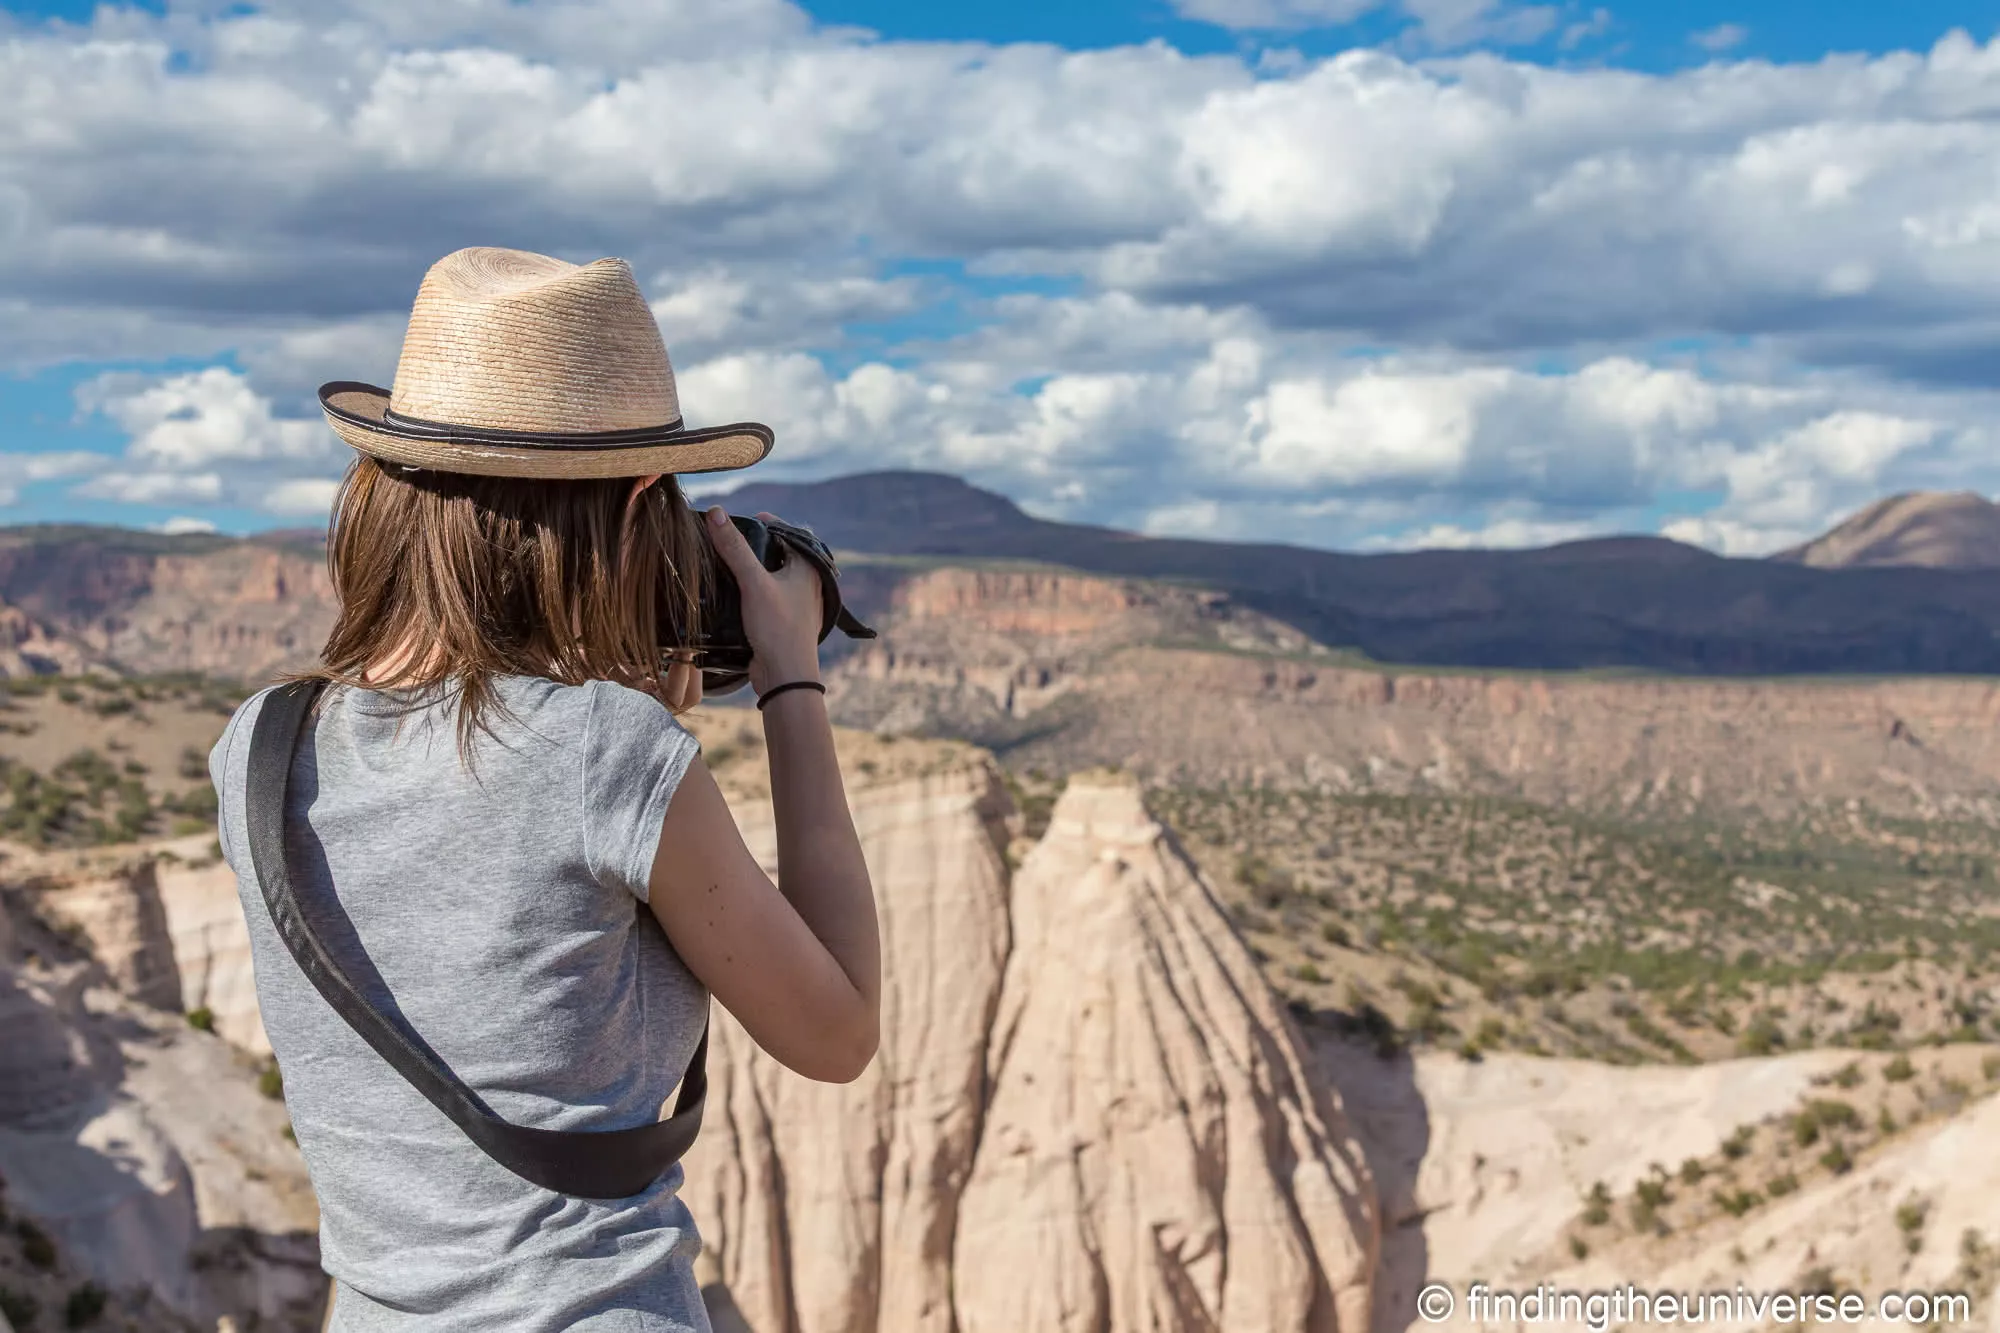
The same frame at f/13: 1/320s, ISO 200. Same lens, same spot, same subject. Only the aperture changed, and now the canyon is much more defined.
At f/2.8, the subject (Jess, in this case) is pin-sharp and everything behind her dissolves into a wash of colour. That’s the look you want for an environmental portrait of a market stallholder, a street performer, or anyone you want to lift cleanly off their setting. It also works in low light, because a wide aperture lets in more light and keeps the ISO down.
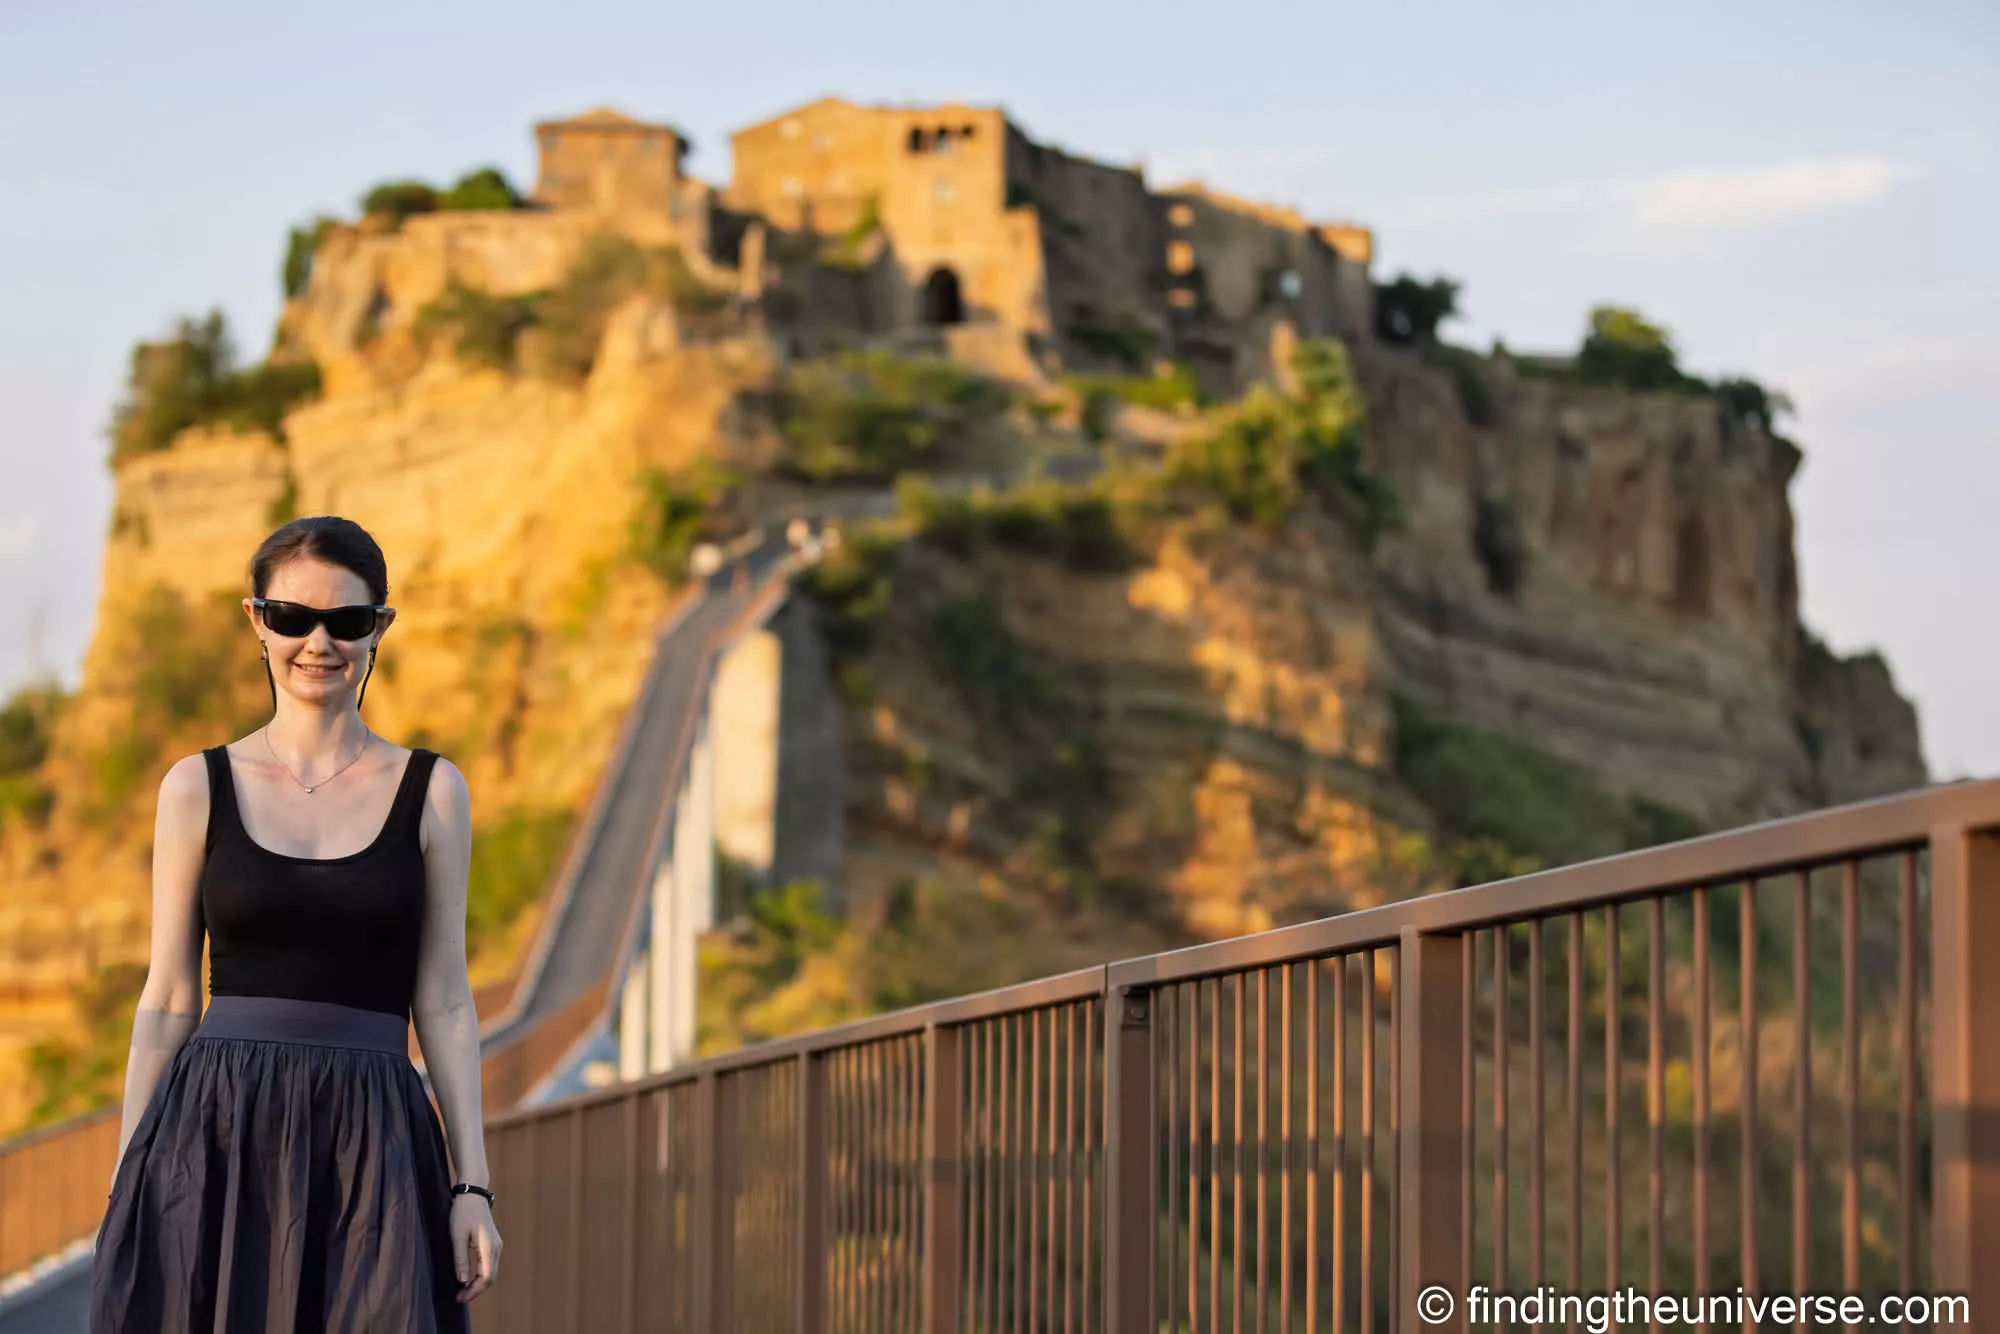
Canon EOS R5 with EF 70-200mm f/2.8L IS II at 70mm. f/2.8, 1/500s, ISO 100. At f/2.8 the hill town behind Jess melts to a soft wash, lifting her cleanly off the setting.
At f/13, the subject is still sharp, but now you can read what’s behind them, be that the texture of the wall, the stall they’re standing in, the bunting strung up overhead. That’s the look for the same subject as part of their context, which is often what a travel photo is actually about. The photo is about the moment, and the moment includes the place.
Landscapes work the same way, in reverse.
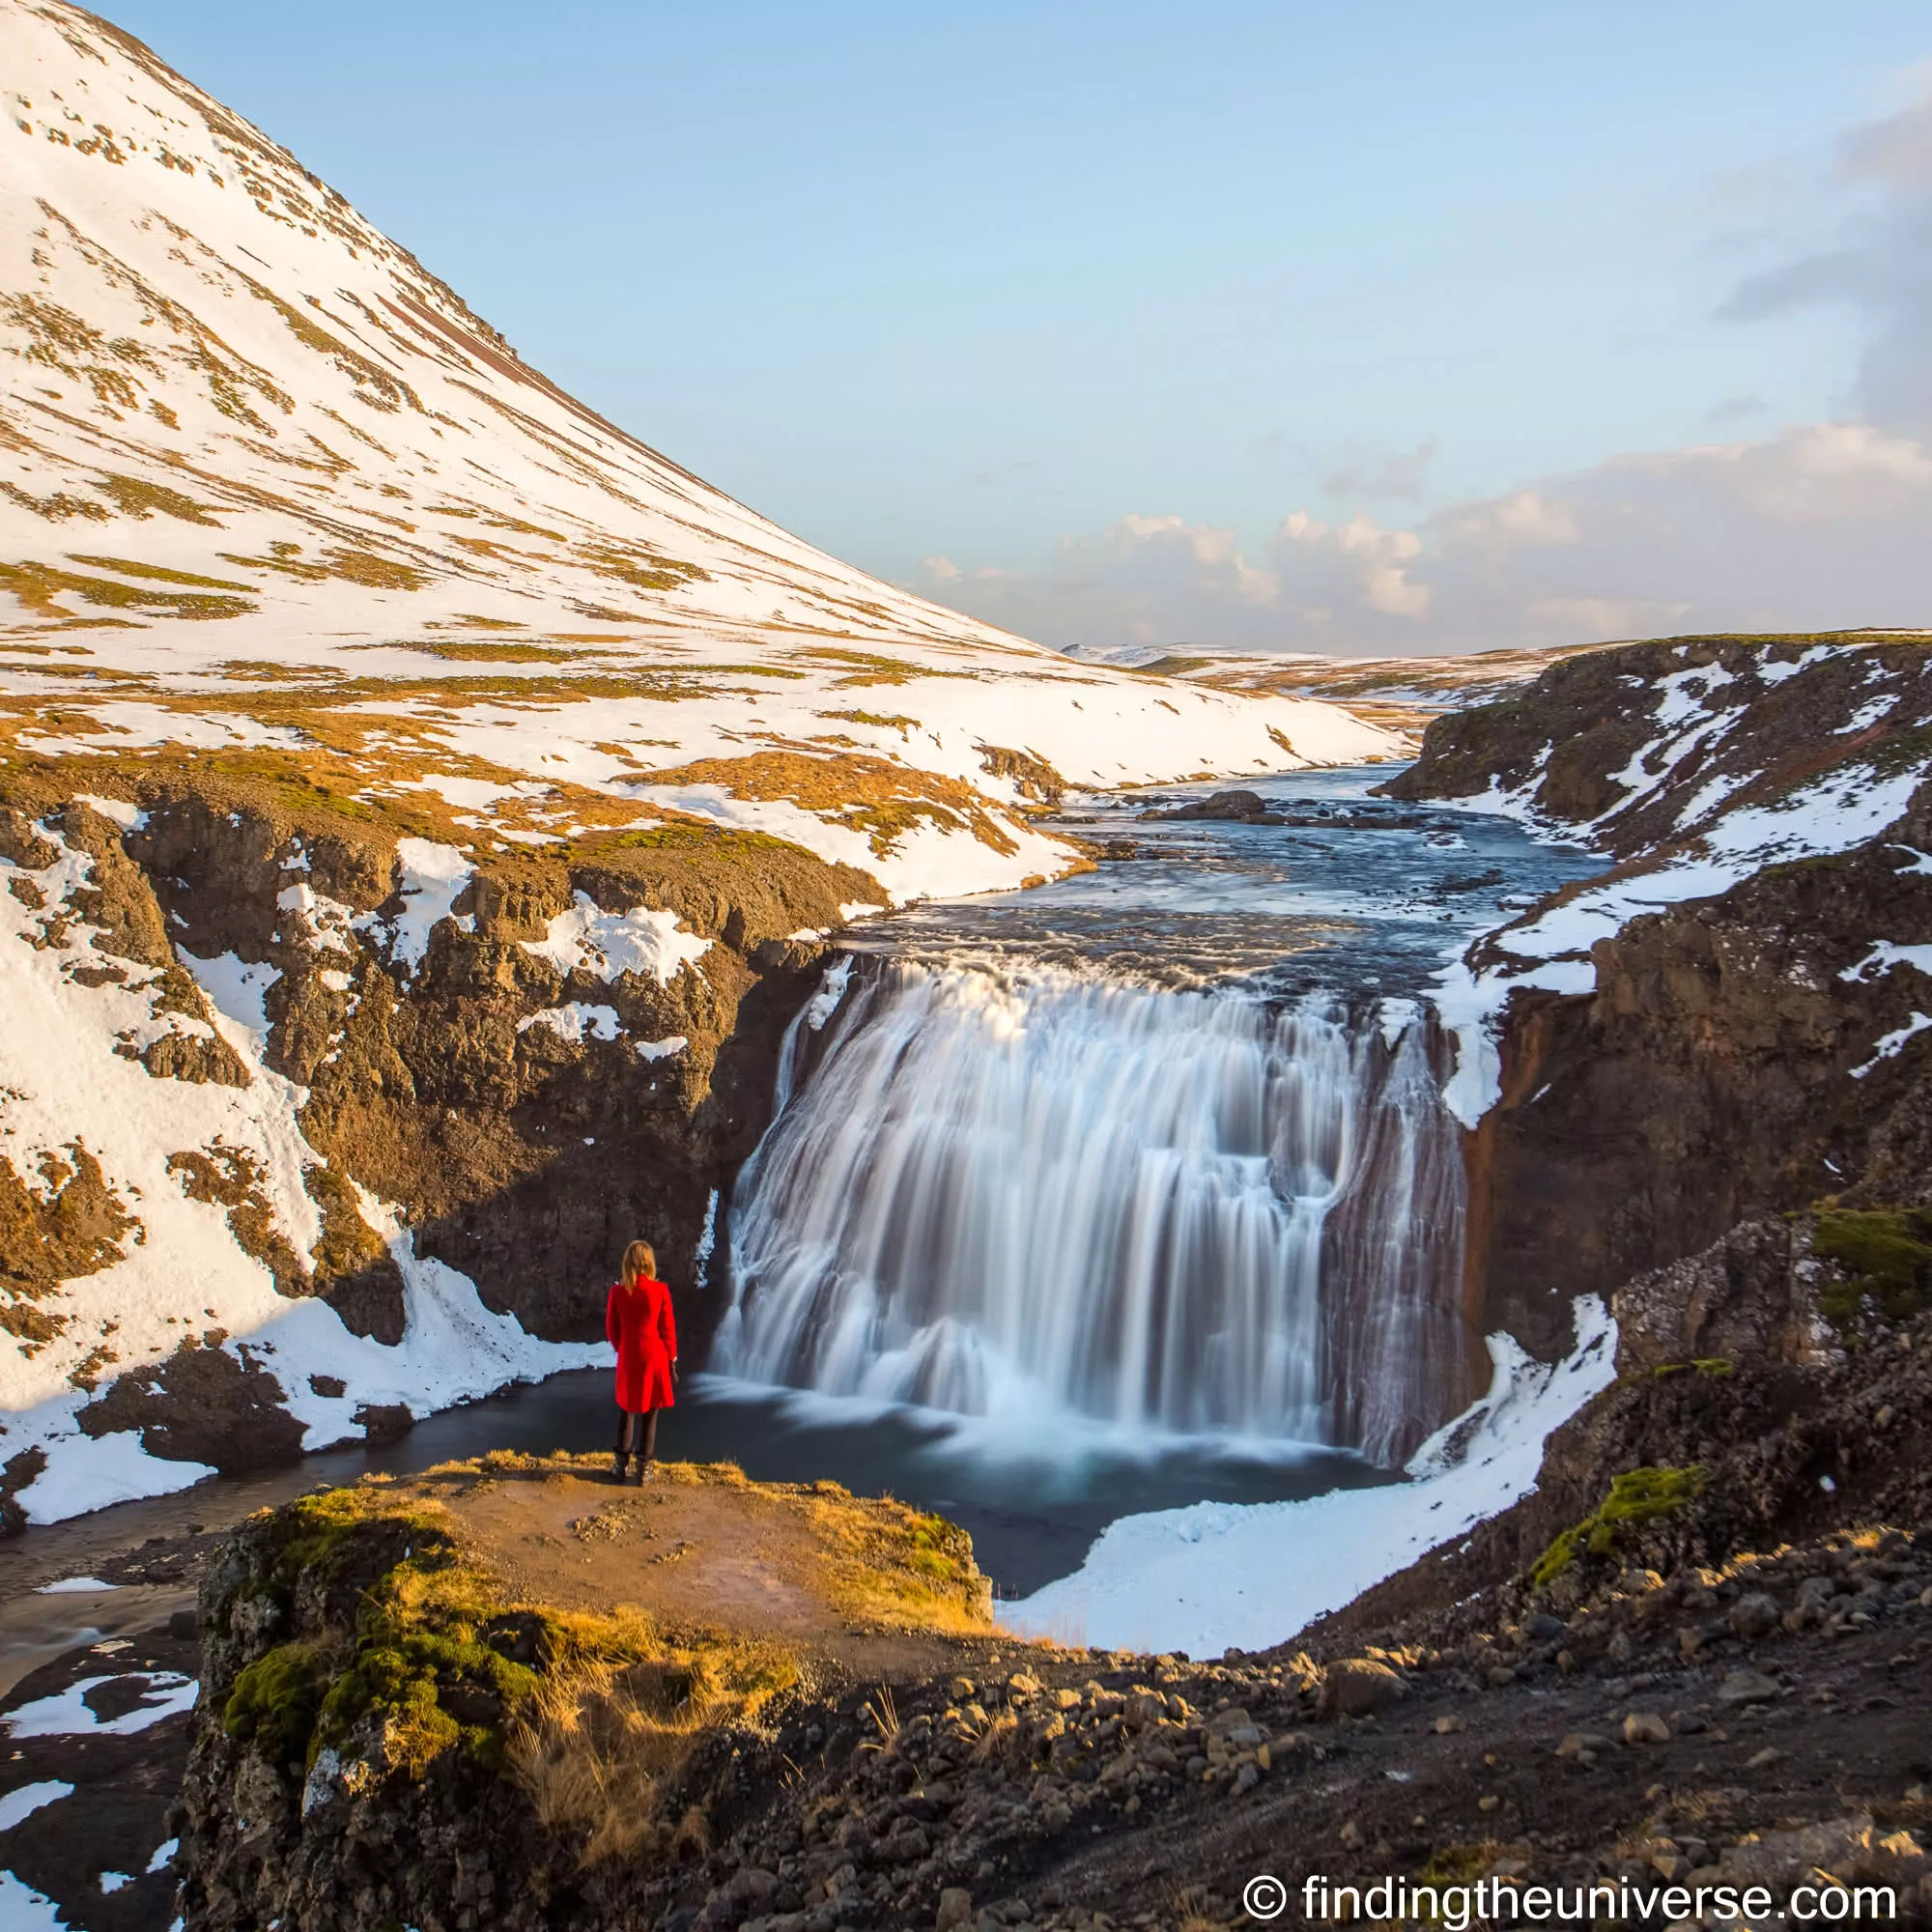
Canon EOS 6D with EF 17-40mm f/4L at 31mm. f/8, 1/5s, ISO 320, -2.7 EV. Þórufoss, Iceland. At f/8 the foreground ledge and the far hillside both hold their detail.
For most travel landscapes you’ll live somewhere between f/8 and f/11. Wide aperture lenses on landscape duty are an exception, not the rule.
One caveat. Past f/16, lens diffraction starts to soften the image even though depth of field is still increasing. On a full-frame body with a sharp prime lens, you’ll see it from f/16 onwards; on smaller sensors and zooms, it kicks in at f/11 or f/12. There’s almost no scenario in travel photography where you need to go past f/16, and most of the time f/11 is sharper than f/16 in every other way that matters.
Setting Exposure Compensation in Aperture Priority
Your camera’s light meter is good, but it isn’t psychic. It assumes the average scene reflects roughly 18% grey, which is fine for most subjects and can be very wrong for some. Aperture priority obeys whatever the meter tells it, so when the meter gets fooled, you have to override it. Exposure compensation is the dial that does that.
On Canon Av, exposure compensation is the dedicated wheel on the top right of most R-series bodies, or the rear thumb wheel on the R8/R50. On Sony A, it’s either a locking top-plate dial or a function-button assignment. On Fujifilm A, it’s the dedicated +/- dial on top of the camera, or, on the X-S20, a rear thumb wheel. On Nikon A, it’s the +/- button next to the shutter, held while turning the main command dial.
You’ll know you need it the moment you look at the back of the camera and see the image darker or brighter than you wanted. Four scenarios cover most of what you’ll meet on the road.
In snow scenes and on bright beaches, the meter sees a lot of bright tones and assumes you’re overexposing, so it darkens the shot. The result is grey snow and grey sand. Dial in +1 to +1.7 EV (positive exposure compensation) to bring the brightness back to where your eye actually saw it.
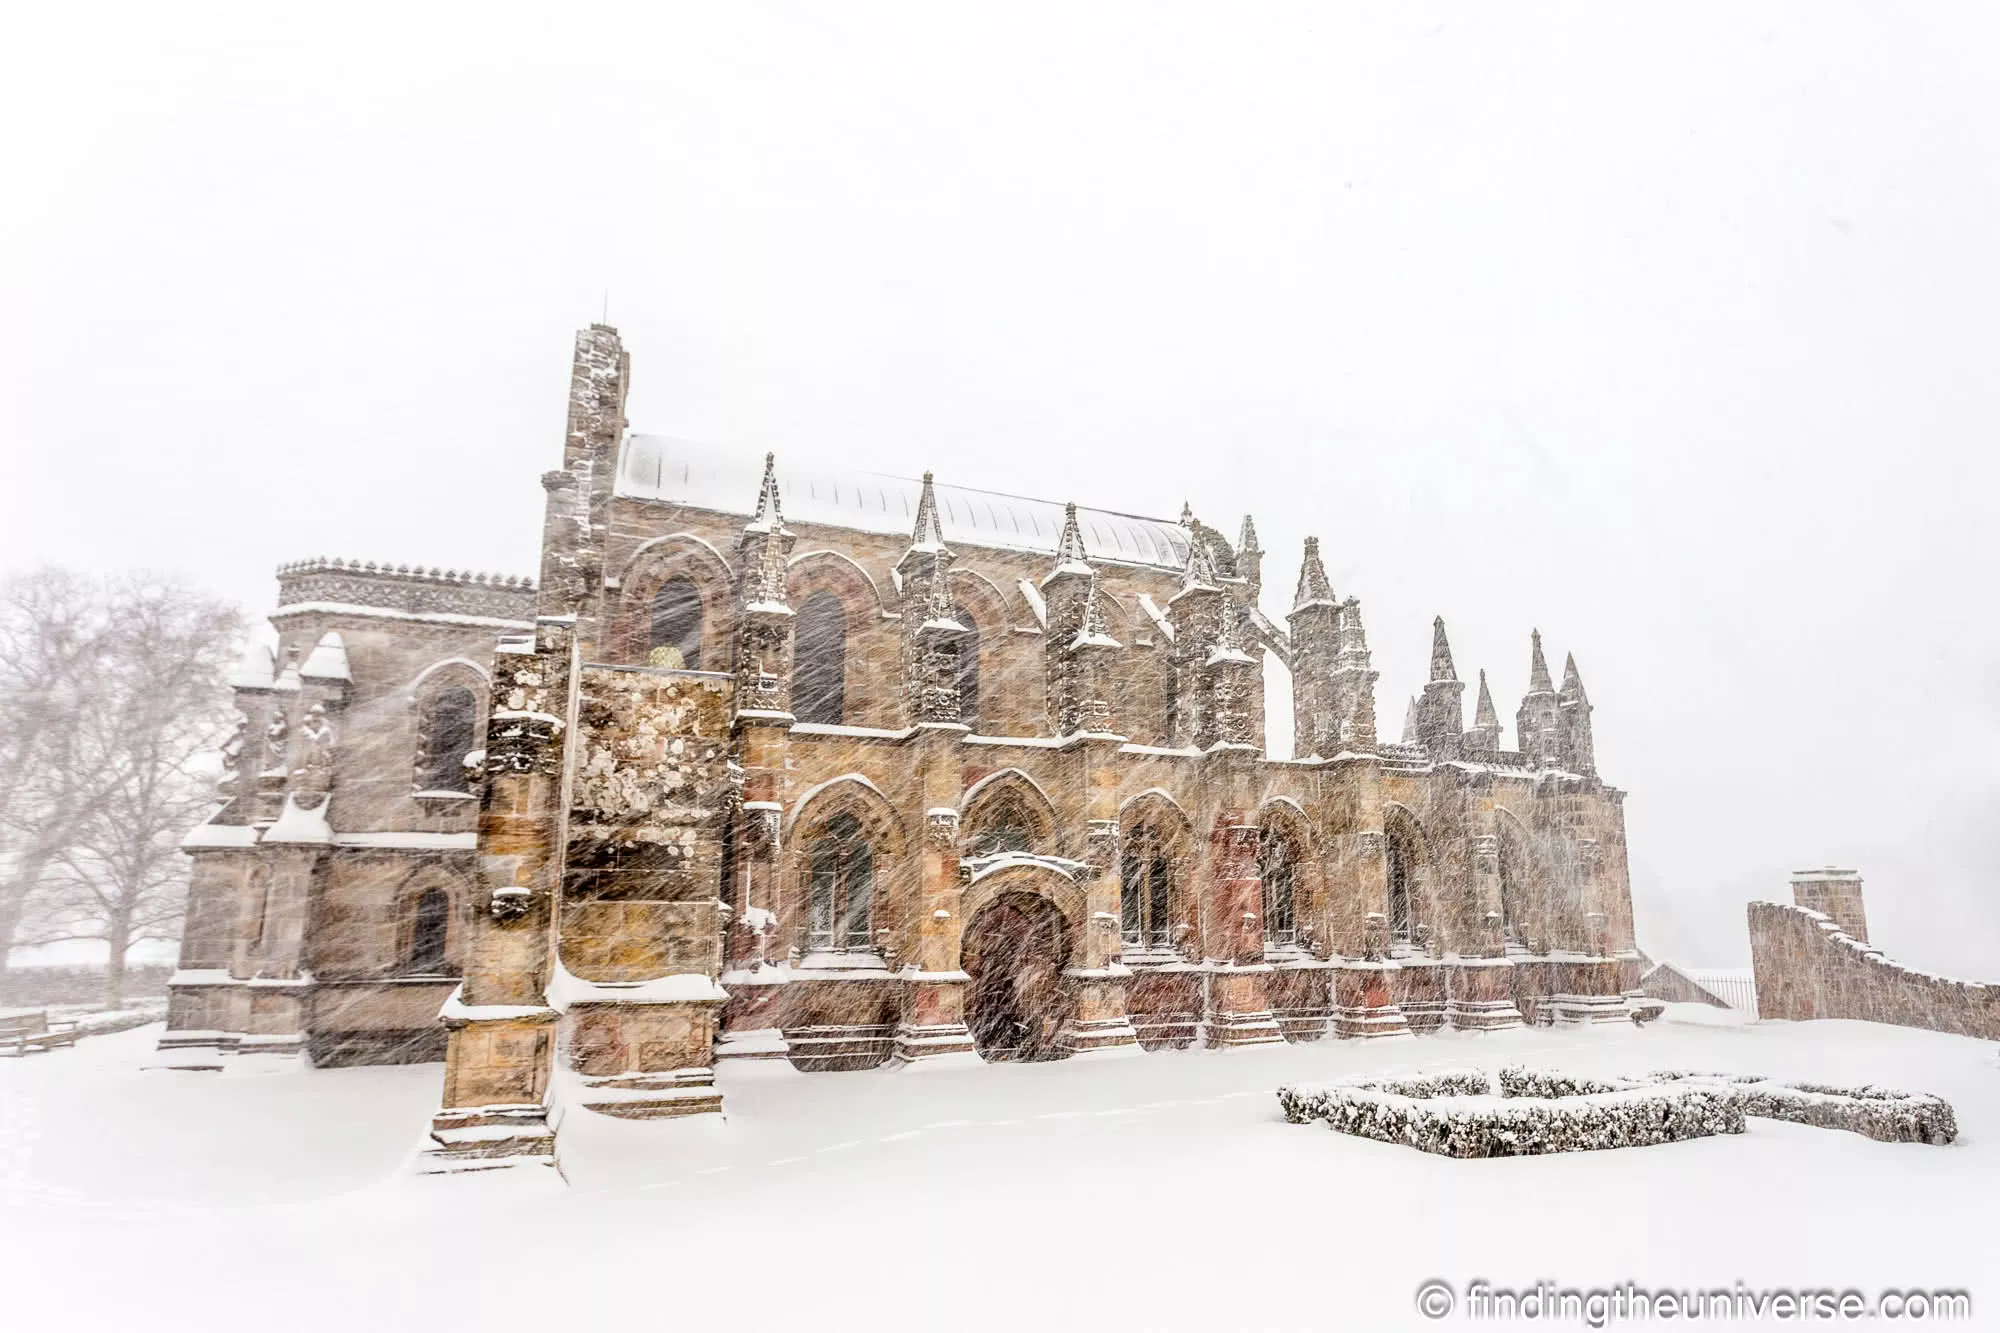
Canon EOS 6D with EF 17-40mm f/4L at 19mm. f/8, 1/15s, ISO 125, +1 EV. Rosslyn Chapel, Roslin. The +1 EV keeps the snow white instead of meter grey.
Backlit landmarks and silhouettes are the second case. Photograph a person or building with the sun behind them and the meter averages between the bright background and the dark subject, leaving you with both wrong: a blown-out sky and a too-dark subject. Dial in +1 EV to expose for the subject and lose the sky, or dial in -1 EV for a deliberate silhouette. Both are valid; just decide which photo you’re taking.
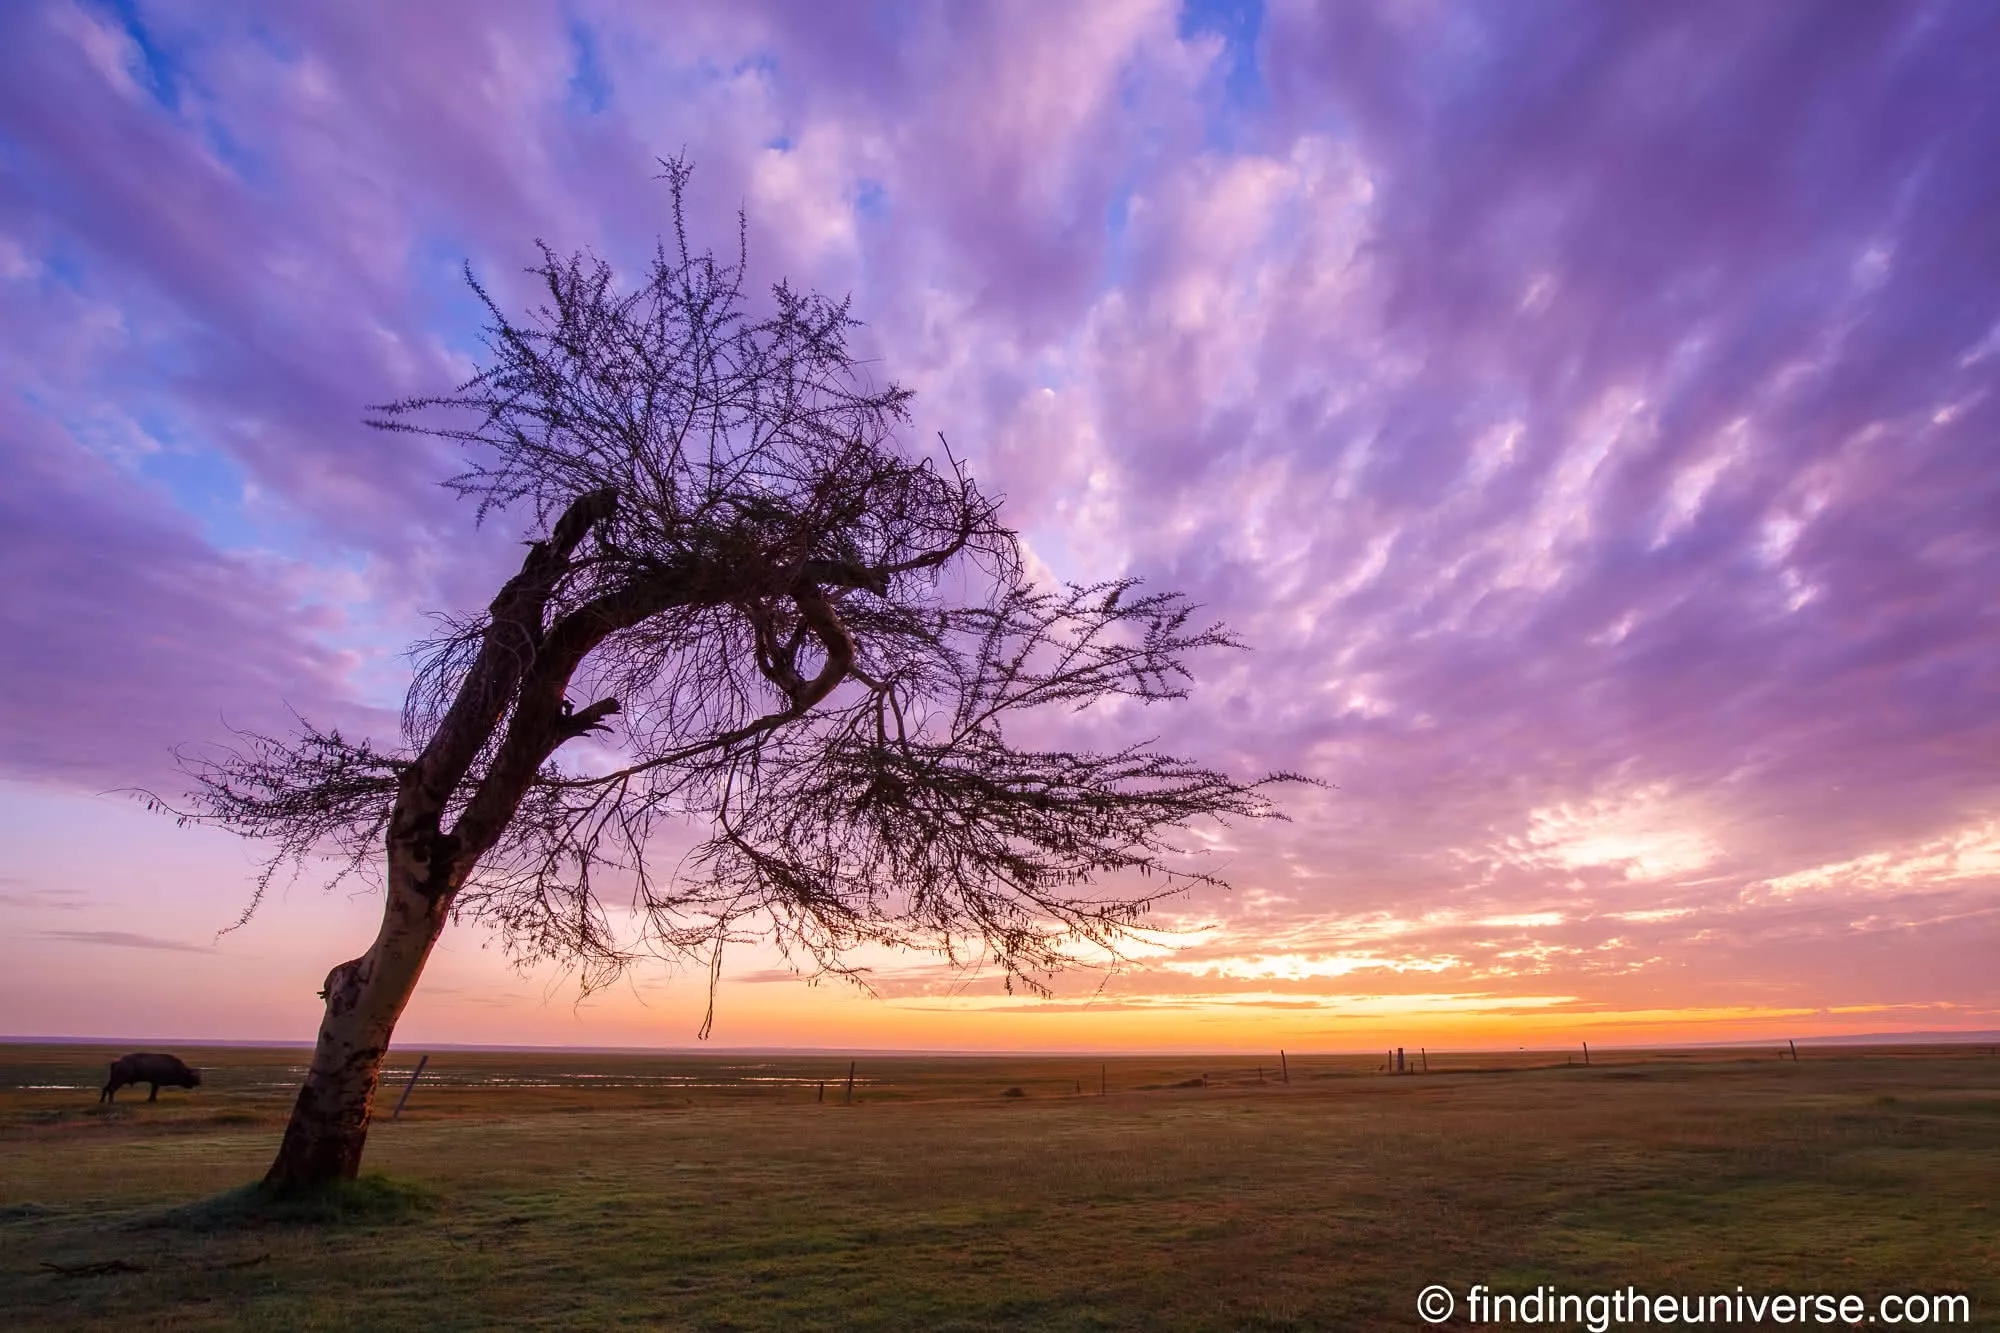
Canon EOS 6D with EF 16-35mm f/4L at 16mm. f/9, 0.4s, ISO 200, -2 EV. Dawn, Kenya. The -2 EV holds the colour in the sky and lets the tree fall to a clean silhouette.
Step inside a souk or a covered market and the meter often overexposes, trying to lift the shadows in the dark interior and blowing out the spill of sunlight from the entrance. Dial in -0.7 to -1 EV to preserve the contrast that makes the scene look like the place you remember.
Late-evening Edinburgh closes, Dublin pub interiors, Reykjavik side streets after dark all have the same problem in reverse. The meter often pulls the exposure up to compensate for the darkness, producing photos that look flatter than the scene actually was. Pull -0.3 to -0.7 EV to keep some of the moodiness that made you want the photo in the first place.

Canon EOS 6D with EF 70-200mm f/2.8L IS II at 70mm. f/2.8, 1/100s, ISO 3200. Up Helly Aa fire festival, Lerwick, Shetland. Aperture priority held the exposure in near darkness lit only by the burning galley.
Get used to checking the back of the camera after every two or three frames in a new scene. Aperture priority plus exposure compensation is faster than Manual mode in changing light, because you’re only adjusting one variable to taste rather than rebalancing two. Some photographers might say you shouldn’t need to check your photos every few frames. I would disagree and say, do what you have to do to get the shots you want.
Use Auto-ISO With a Minimum Shutter Speed (Set It Once and Forget It)
The single biggest unlock with aperture priority is pairing it with Auto-ISO and a minimum shutter speed limit. This is the setting that took me a while to discover and ten minutes to set up, and once it’s done, it stays done.
The problem aperture priority can have is that as light drops, the camera will keep your aperture where you set it and slow the shutter speed instead. That’s fine until the shutter gets slow enough to introduce camera shake or subject motion blur, and then the photo is ruined for reasons that have nothing to do with your aperture choice. The fix is to tell the camera: pick the shutter speed you need, but never go below this floor; if you need more exposure than that, raise the ISO instead.
You’ll also want to set an ISO range, which will depend on your camera. On my R5, I normally have it between 200 and 6400, which produces good results, although I will tweak it in some situations.
Every current Canon, Sony, Nikon, and Fujifilm body has an Auto-ISO setting. The menu name and the exact path varies a little by brand.
On Canon, the path is Menu → Shooting menu → ISO Speed Settings → Min. shutter spd. Set the floor manually (typical values: 1/60s for wide-angle hand-held, 1/125s to 1/250s for short telephoto, 1/500s or faster for long telephoto), or set it to AUTO with a stops offset for the camera to pick a floor based on focal length. There’s a walkthrough with screenshots on Canon Snapshot.
On Sony, the path is Menu → Exposure/Color → Exposure → ISO AUTO Min. SS. Sony lets you set this to a numeric value or pick from FASTER, FAST, STD, SLOW, SLOWER for a focal-length-relative floor. Covered in the A7 IV help guide.
On Nikon, the path is Photo Shooting menu → ISO sensitivity settings → Auto ISO sensitivity control → Minimum shutter speed. Set it to a numeric value or AUTO. Nikon’s Z8 manual has the path.
On Fujifilm, the path is Shooting Setting → ISO AUTO Setting → AUTO1/2/3 → MIN. SHUTTER SPEED. Fujifilm gives you three preset banks so you can set up a wide-angle preset, a short-tele preset, and a long-tele preset, and switch between them depending on the lens you’ve got mounted.
The values I use as defaults on the R5, adjustable by lens:
- Wide-angle lens (16-35mm): minimum 1/60s
- Standard lens (24-70mm range): minimum 1/125s
- Short telephoto (70-200mm): minimum 1/200s at 70, 1/500s at 200
- Long telephoto (100-400mm at 400, or 70-200 with a 2x): minimum 1/1000s
- ISO cap: 6,400 on the R5 (you can push higher and still get a usable file, but noise reduction in post starts mattering more than the exposure decision)
The reciprocal rule (set a shutter speed that’s the reciprocal of your focal length, so 1/100s for a 100mm lens) is the textbook starting point, but it predates in-body image stabilisation. If you’ve got 4 to 7 stops of IBIS in your body, the rule under-promises by a wide margin. I still set my minimums conservatively, because IBIS handles my shake but not the subject’s, and travel subjects (musicians, dancers, market traders, children running through a square) move whether the camera does or not.
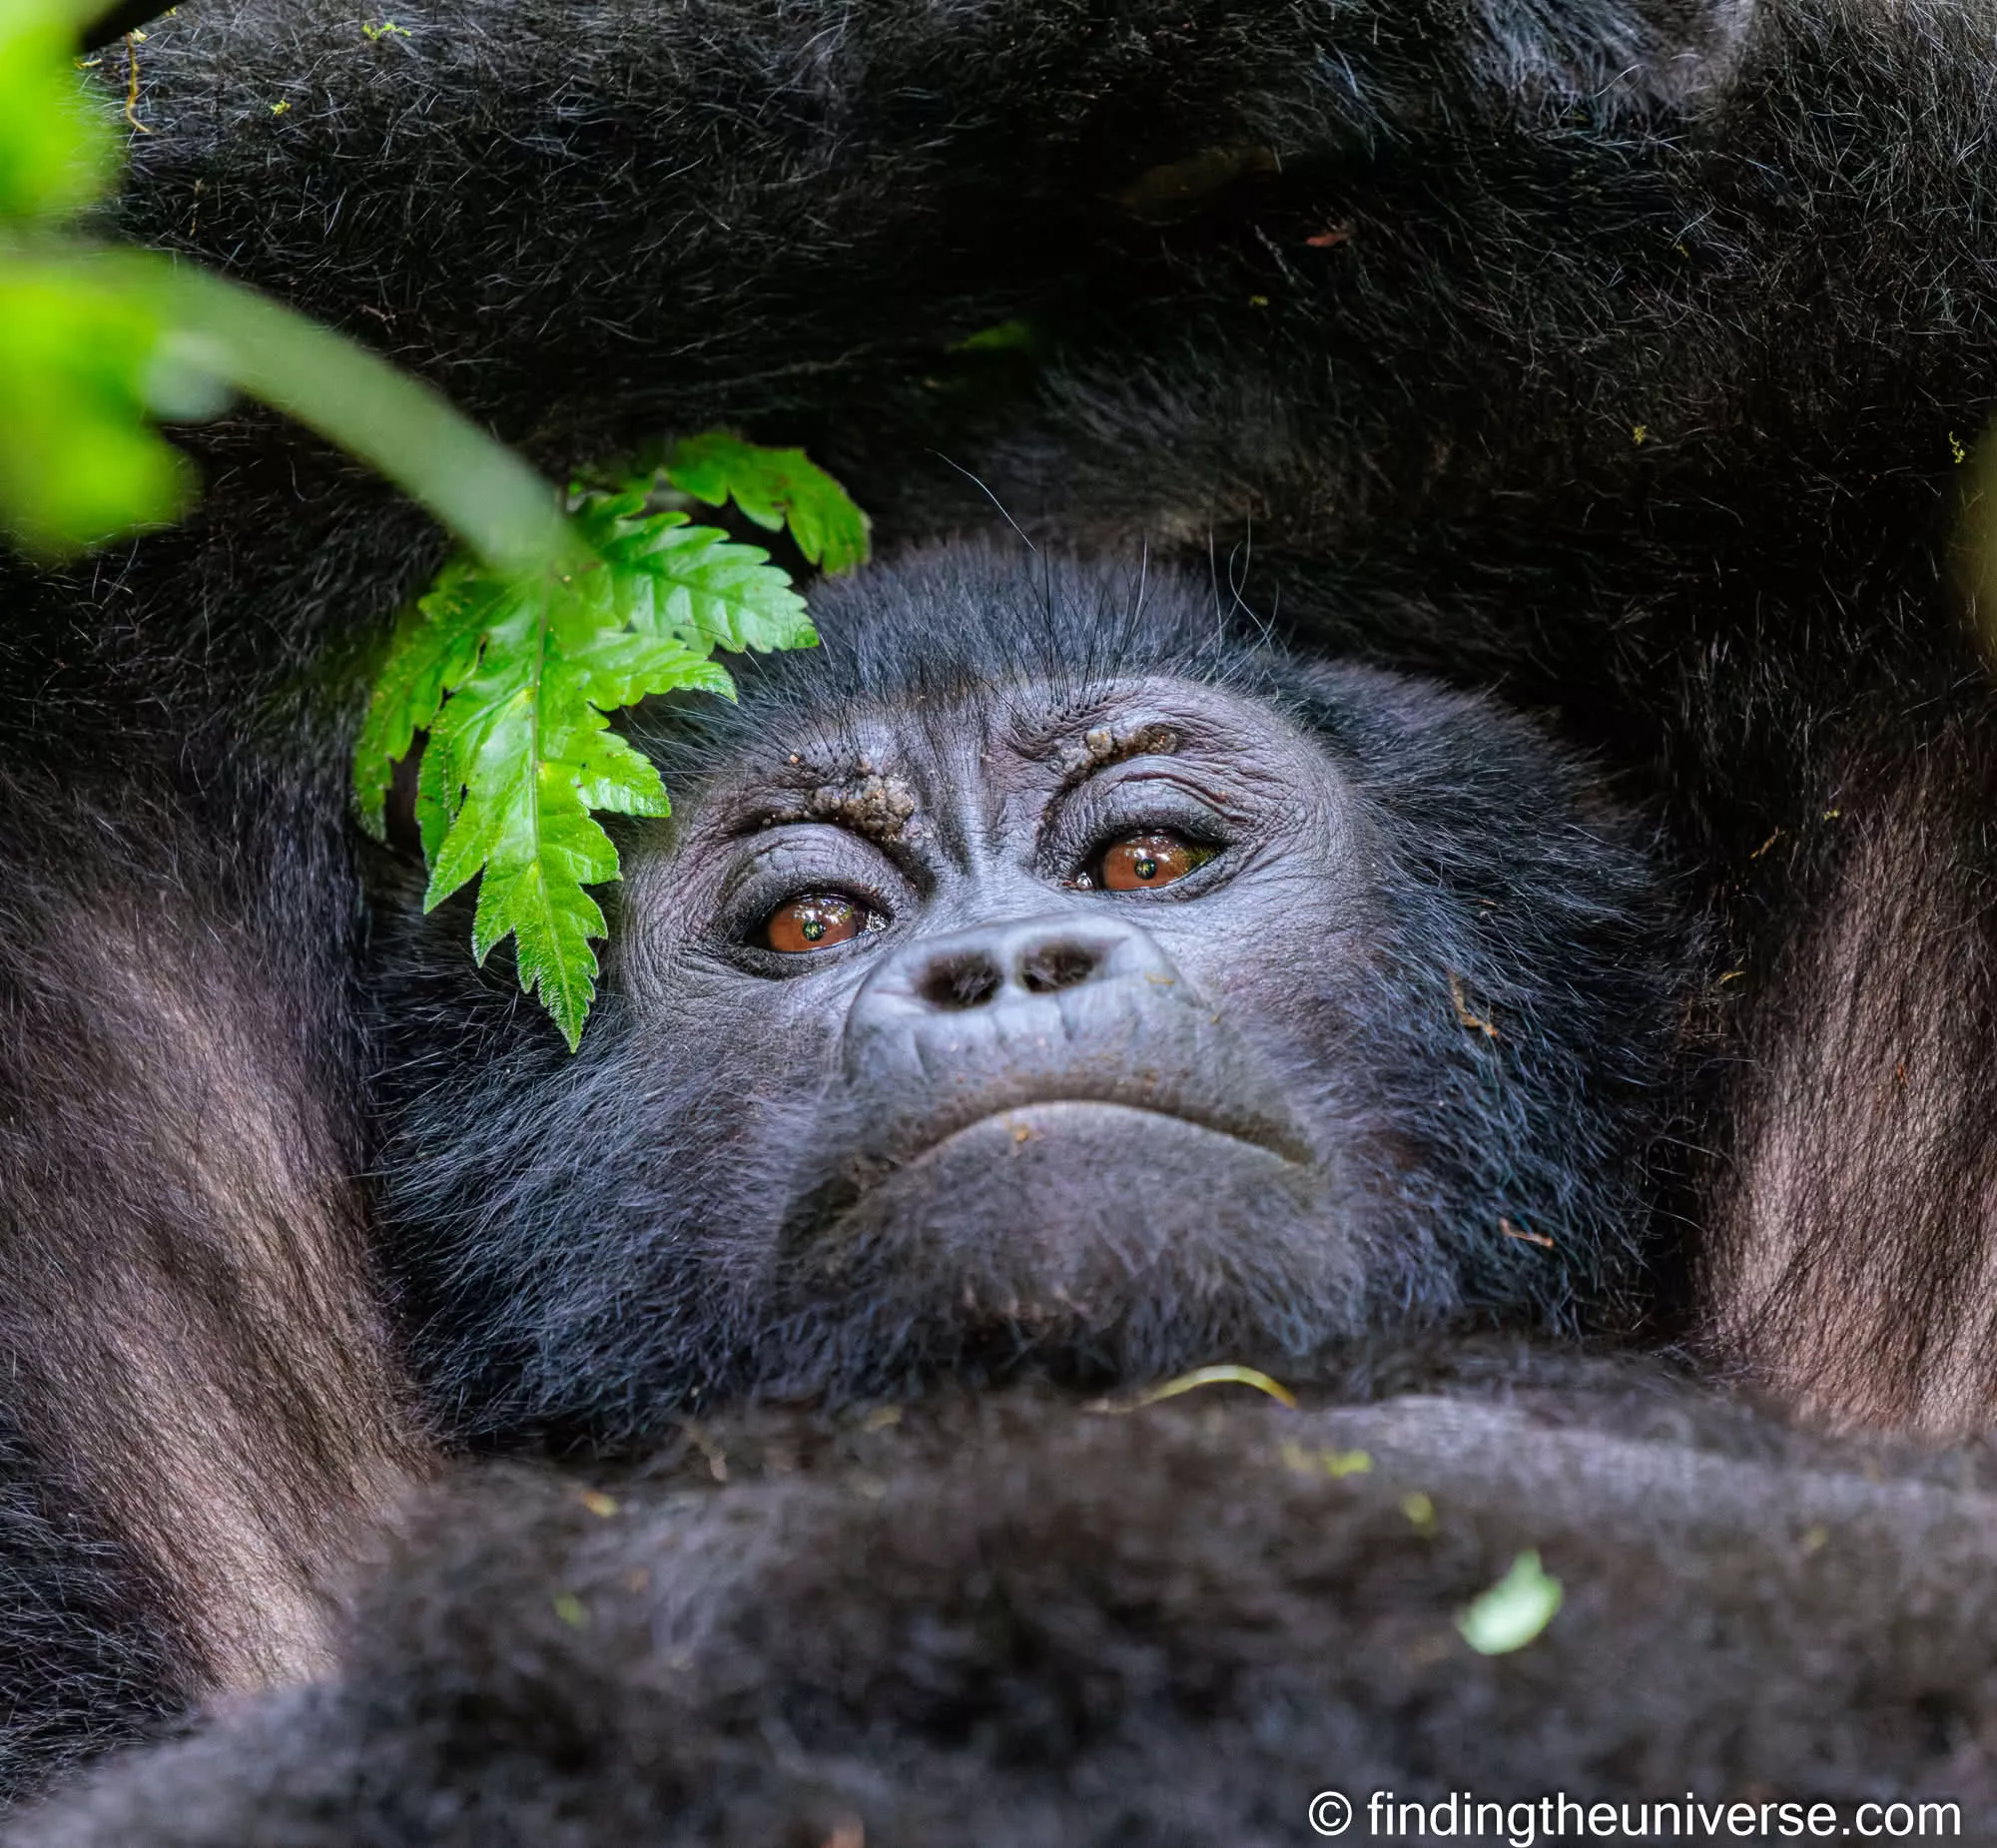
Canon R5 with EF 100-400mm f/4.5-5.6L IS II at 400mm. f/5.6, 1/125s, ISO 10000. Gorilla trekking, Uganda. Auto-ISO climbed to 10000 to keep a usable shutter speed in the forest gloom. Better a noisy photo than a blurry one, noise reduction software is almost magic these days.
Set Auto-ISO and minimum shutter speed up once, on a quiet evening at home, and you’ll spend the rest of your travel photography life pressing a shutter button rather than chasing settings.
When to Use Aperture Priority, and When Not To
Aperture priority is the right mode for the vast majority of travel photography: landscapes, environmental portraits, market and street scenes, food, architecture, sunrise and sunset, low-light city work, hand-held interiors, and most wildlife at distance with a long lens.
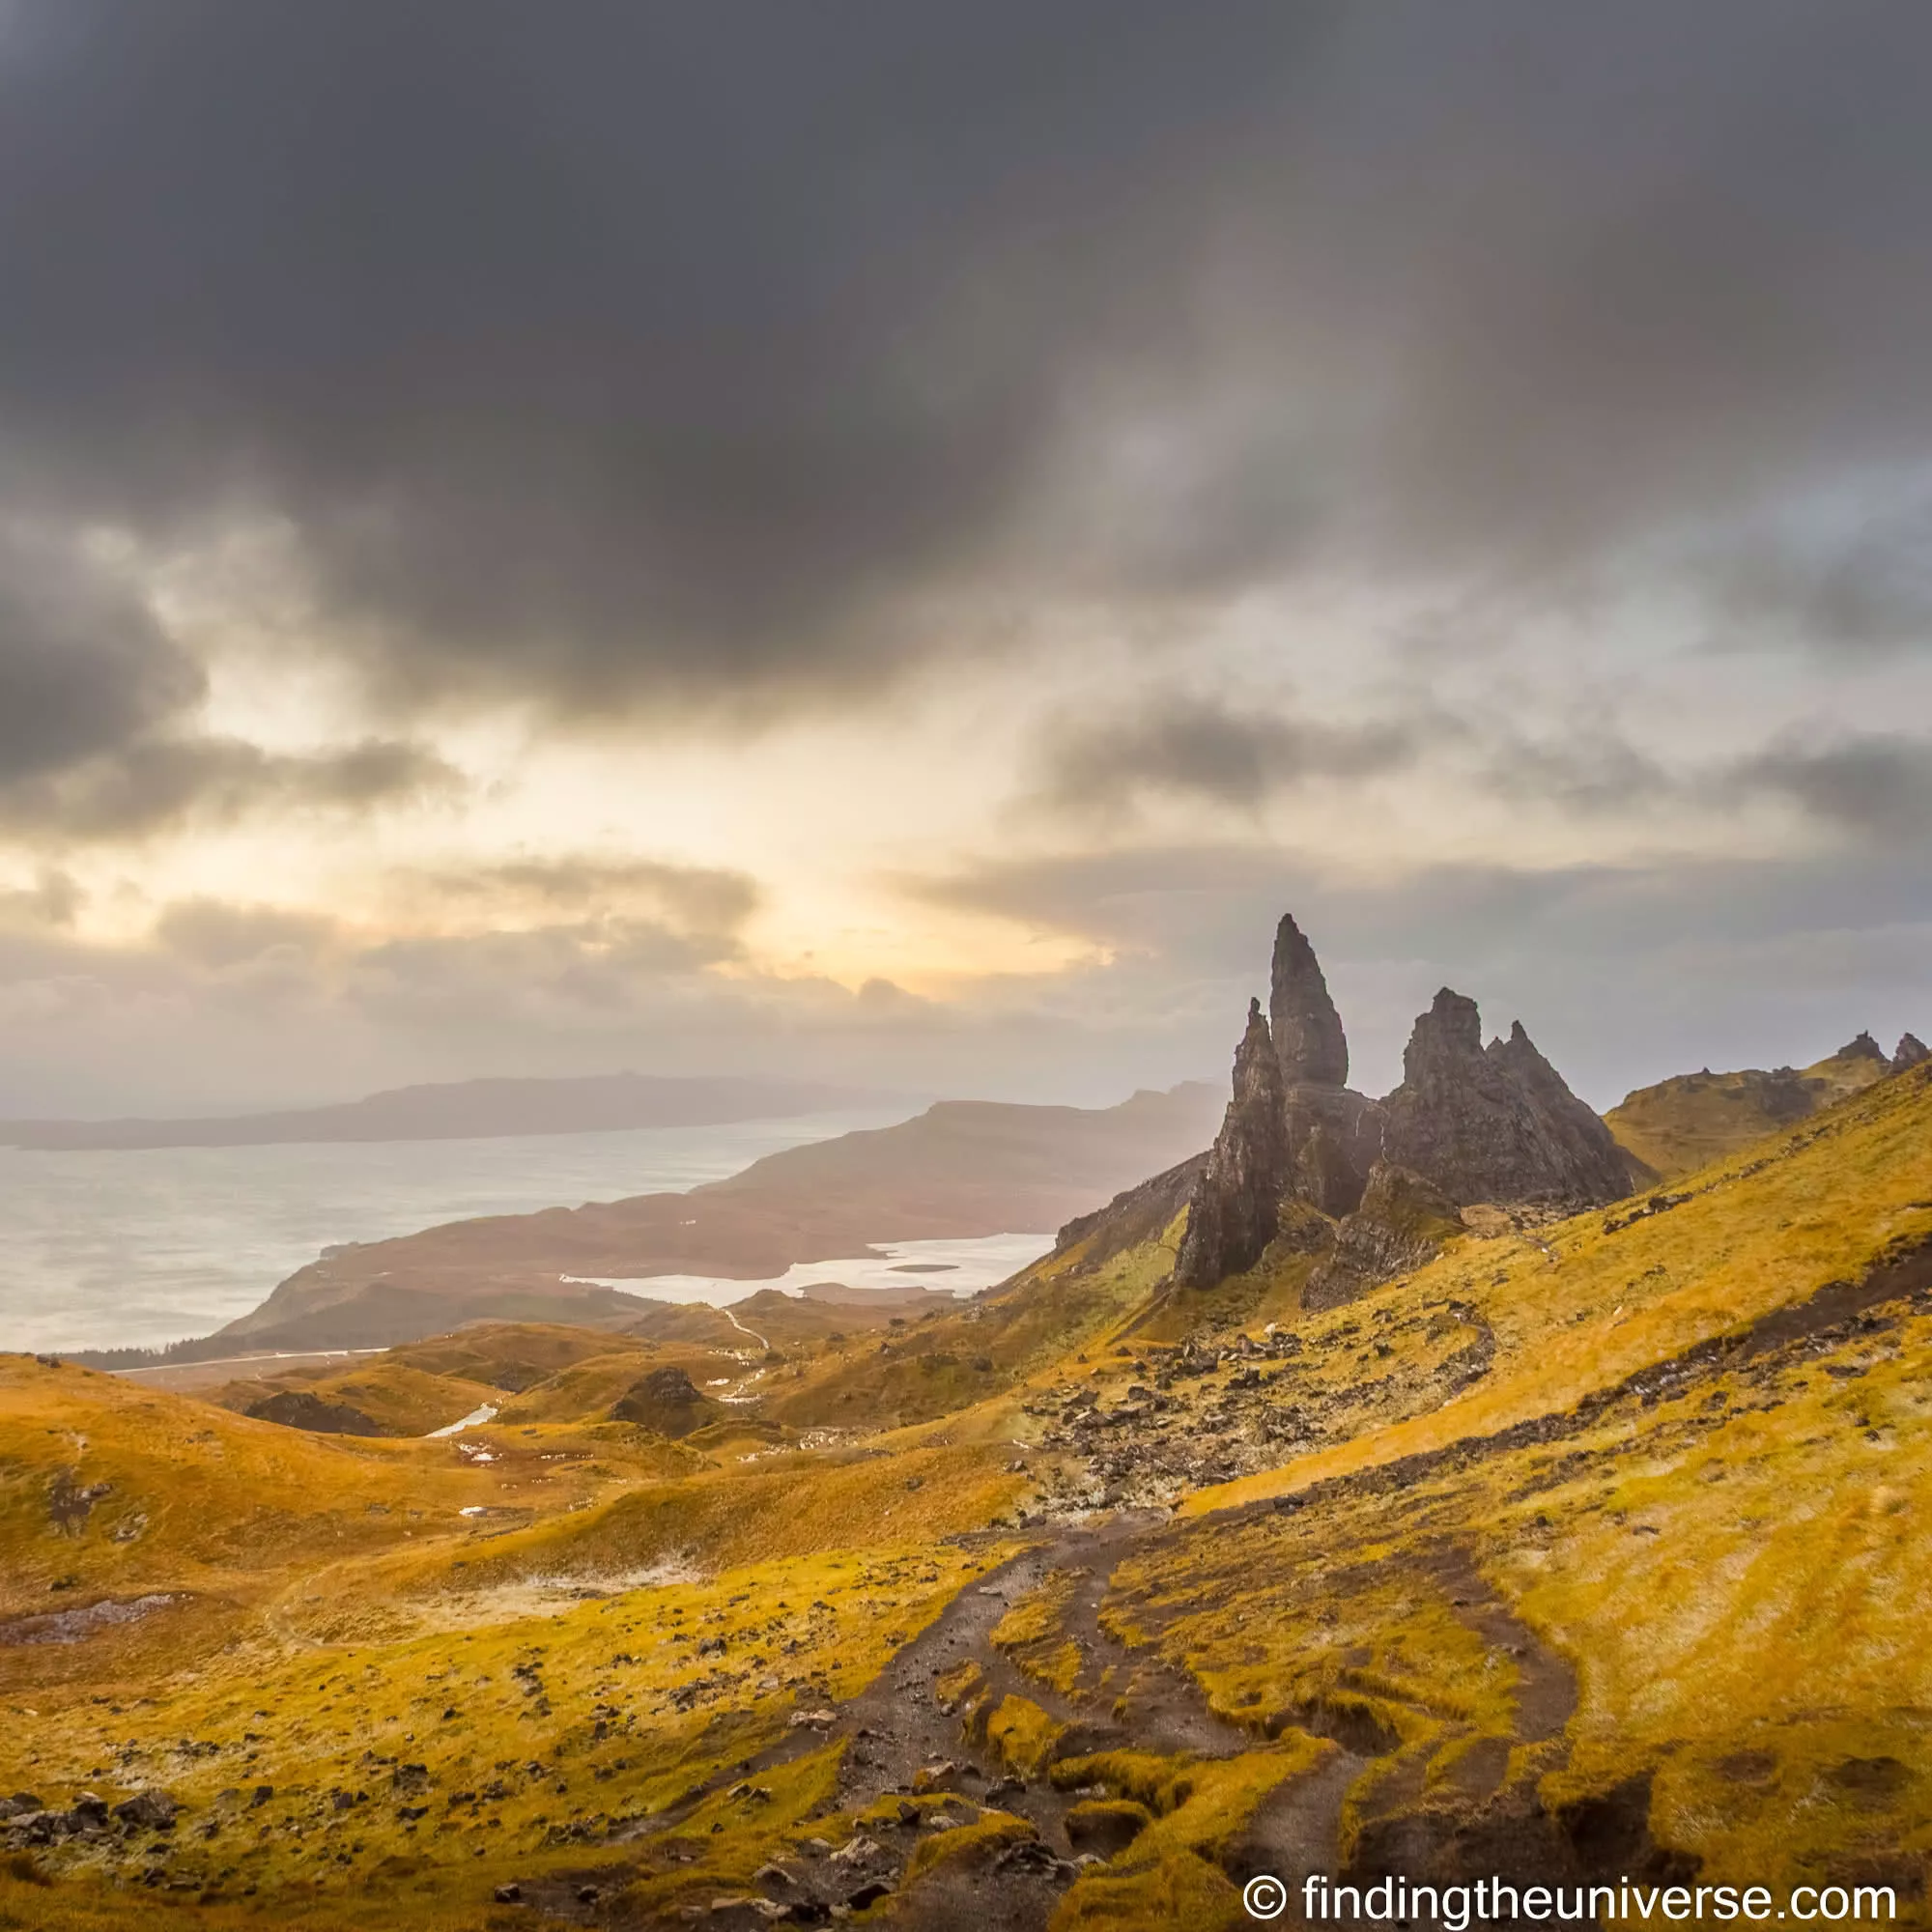
Canon EOS 6D with EF 17-40mm f/4L at 19mm. f/8, 1/500s, ISO 400, -2.7 EV. The Old Man of Storr, Isle of Skye.

Panasonic Lumix GX8 with the Lumix G 12-35mm f/2.8 at 12mm. f/2.8, 1/320s, ISO 200. The tanneries, Marrakesh. Aperture priority copes with a busy, high-contrast scene like this without fuss.
It’s the wrong mode in four situations. For sport, action, or anything where freezing motion matters more than depth of field, use shutter priority (Tv on Canon, S on Sony, Nikon, and Fujifilm) so you can set the shutter speed directly. A puffin in flight at 1/2000s and a bagpiper striding through Princes Street Gardens at 1/500s both demand a specific shutter speed the camera shouldn’t be allowed to vary.
For long exposures on a tripod, switch to Manual. You’re setting both the aperture and the shutter speed deliberately, so there’s nothing for the camera to decide. For flash photography in mixed light, Manual or one of the dedicated flash modes is usually cleaner, depending on your flash system. For astrophotography, Manual every time, because you’re working to specific shutter and ISO values that the meter has no idea what to do with.
The most common mistake is using shutter priority for situations where aperture priority would actually be safer. Beginners often default to “I want a fast shutter, so I’ll set the shutter directly”, which is fine in principle, but in mixed light shutter priority will let the aperture wander all the way to wide open and the ISO climb without warning. Aperture priority with a minimum shutter speed gives you the same guarantee of a sharp photo with much better creative control over the look.
Aperture Priority Versus Manual: When to Graduate
If you’ve spent any time in the photography corners of Reddit, you’ve been told that Real Photographers Shoot Manual. This isn’t true. Most working travel photographers I know stay in aperture priority most of the time, because Manual mode is slower in changing light and adds nothing creatively in scenes where the meter is doing the right thing.
Manual mode is the right tool when:
- The lighting won’t change for the duration of the shot (long exposures, studio, predictable indoor light)
- You want every frame in a sequence to have an identical exposure (panoramic stitches, focus stacks, timelapses)
- You’re working with flash or strobe, where the meter is meaningless
- You’re deliberately exposing for one tone in a high-contrast scene (the highlight on a dancer’s face, the silhouette against the sunset)
Outside those situations, aperture priority plus exposure compensation is faster, just as accurate, and lets you concentrate on the subject rather than the dials. The camera is faster at metering than you are, and it does that one job dozens of times per second.
Fv Mode: The Canon Hybrid I Use Instead of Manual
There’s one more option, and it’s Canon only. Most current Canon R-series bodies have a mode called Fv, short for Flexible-value, and it’s the one I reach for more often than Manual. Fv lets you set the aperture, the shutter speed and the ISO each to either a fixed value or Auto, and flip any of them between the two without leaving the mode. Leave everything on Auto except the aperture and it behaves exactly like Av. Pin the shutter speed as well and it behaves like Manual with Auto-ISO. You decide, frame by frame, how much the camera gets to handle.
Where it earns its keep is wildlife, where a scene can go from fast to still in a second. A puffin sitting on a clifftop wants a different shutter speed from the same puffin taking off, and in Fv I can hold a fast shutter while there’s action, then let it drop back to Auto the moment the bird settles, without spinning out of the mode and rebuilding the exposure from scratch. If you’re on Canon and Av has started to feel like it’s holding you back, Fv is worth learning once the basics are second nature.
Treat these modes as tools for different jobs rather than as a hierarchy you graduate up through. Know which one suits the situation and switch confidently between them. After 16 years on the same mode dial, I still spend most of my shooting day in Av, drop into Fv when a scene keeps changing pace, and reach for Manual on the long exposures and flash work where it earns its place.
Common Aperture Priority Mistakes I See in Travel Photographers (And a Few I Made Myself)
Most aperture priority photos that don’t work fail for one of a small number of reasons. The shortlist below is drawn from years of reviewing other photographers’ work, and from an embarrassing run of my own early mistakes.
The first is forgetting exposure compensation exists. The meter is trying its best, but it’ll get fooled by snow, beaches, backlight, dark interiors, and dark-skinned subjects (which the meter will tend to overexpose). Check the back of the camera, dial in compensation, reshoot. I spent my first year of travel photography ignoring this and wondering why my Iceland snow shots looked like wet concrete.
Next is letting the aperture wander to wide open in low light. Aperture priority will hold the aperture you set, even as light drops. If you’ve left it at f/1.8 and the ISO is climbing past 6400 because the shutter has to stay above your minimum, the photo will still expose, but you’ll get a wafer-thin depth of field that puts only one eye in focus. Set a sensible default (f/4 or f/5.6 for most scenes) and only go wider when you actually want shallow depth.
A close cousin is setting Auto-ISO without a minimum shutter speed at all. Auto-ISO with no shutter floor lets the shutter drop until it triggers the reciprocal-rule default, which on a 24mm lens is around 1/30s. That’s not fast enough for a hand-held shot of anyone moving, including the photographer breathing. Set the minimum manually, on every body.
Stopping down too far for the scene is another regular. You don’t need f/22 for a sweeping landscape. Past f/16 on a full-frame body, diffraction softens the image faster than depth of field hardens it. f/11 is the working ceiling for almost every travel landscape; going beyond it is rarely a creative decision and almost always a costly one.
Trusting the meter on backlit subjects is the single most consistent error in the work of new travel photographers. The classic shot is a portrait of a friend with the sea or a monument behind them, framed at midday, shot in aperture priority with no exposure compensation. The subject comes out as a silhouette and the background is correctly exposed. The fix is either +1 EV to expose for the face, a fill flash, or moving so the subject isn’t backlit at all. I made this mistake in front of Versailles. Twice. In one afternoon.
Locking onto one aperture for the whole day is the other side of the same coin. Aperture is a creative choice, not a settings preset. Walking around with the camera at f/8 because someone on YouTube said it’s the sharpest aperture means you’ll miss every shallow-DoF portrait and every wide-open low-light shot that an alley or a candlelit restaurant offers. Change it for the scene.
The last one I see often is confusing exposure compensation with ISO override. Exposure compensation tells the camera to expose the scene brighter or darker than the meter says. In aperture priority with Auto-ISO, that usually translates to a change in shutter speed or ISO (the camera picks). It does not lock the ISO to a specific value. If you want a specific ISO, set ISO manually and let aperture priority handle the shutter.
None of these mistakes are permanent. The fix in every case is the same: check the back of the camera between frames, decide what isn’t working, change one variable, and reshoot.
Aperture Priority FAQ
What is aperture priority mode in plain English?
Aperture priority is a semi-automatic exposure mode where you set the aperture (and usually the ISO), and the camera automatically sets a shutter speed for a correctly exposed photo. You keep direct creative control over depth of field while the camera handles the metering. On Canon bodies it’s called Av; on Sony, Nikon, and Fujifilm it’s called A. The behaviour is identical across all four.
When should I use aperture priority for travel photography?
For most travel scenes: landscapes, environmental portraits, markets, street, food, architecture, hand-held low-light interiors, and wildlife at distance. Aperture priority is the right default mode for any scene where you care about depth of field more than you care about shutter speed, which covers around 90% of travel photography. Switch to shutter priority for action and sport, and to Manual for long exposures and flash work.
Is aperture priority better than Manual mode?
It’s faster and more accurate in changing light, which is most of the light you’ll meet on a travel shoot. Manual is more deliberate and is the right choice for long exposures, timelapses, panoramic stitches, and flash photography. Most working travel photographers I know stay in aperture priority most of the time and switch to Manual when the scene calls for it. The two modes aren’t a hierarchy, they’re tools for different jobs.
What aperture should I use for travel photos?
It depends on the scene. For environmental portraits and shallow-depth subject isolation, f/1.8 to f/2.8. For street and market scenes where you want both subject and context, f/4 to f/5.6. For landscapes where you want everything sharp front-to-back, f/8 to f/11. Past f/16 on a full-frame body diffraction softens the image, so f/11 is the working ceiling for most travel landscapes. There’s no single right answer; choose the aperture that matches the photo you’re trying to take.
What is Fv mode on Canon?
Fv, short for Flexible-value, is a Canon mode that lets you set the aperture, shutter speed and ISO each to either a fixed value or Auto, and flip any of them between the two without leaving the mode. It behaves like aperture priority when only the aperture is fixed, like shutter priority when only the shutter is fixed, and like Manual when you set both. It’s the mode I use in place of Manual most of the time, and it comes into its own when a scene keeps changing pace, like wildlife that goes from fast action to sitting still. Sony, Nikon and Fujifilm don’t have a direct equivalent, though you can get close with Auto-ISO and the command dials.
How do I switch my camera into aperture priority?
Turn the mode dial to Av (Canon) or A (Sony, Nikon, Fujifilm). On Fujifilm X-T-line bodies (X-T5, X-H2, X100VI), set the shutter-speed dial on top of the body to A and turn the aperture ring on the lens to your chosen f-stop. On Fujifilm X-S20 and X-S10, use the conventional PSAM mode dial in the A position. Aperture is then controlled by either the lens ring (Fujifilm with twin-dial), the front command dial (Sony, Nikon, Fujifilm X-S), or the main dial behind the shutter (Canon).
Why are my aperture priority photos coming out blurry?
Almost always a shutter speed too slow for the focal length or the subject. Aperture priority sets the shutter speed for you, and in low light it can drop below the threshold for sharp hand-held shots. The fix is to enable Auto-ISO with a minimum shutter speed: on Canon it’s Min. shutter spd. under ISO Speed Settings, on Sony it’s ISO AUTO Min. SS, on Nikon it’s Minimum shutter speed under Auto ISO sensitivity control, on Fujifilm it’s MIN. SHUTTER SPEED under ISO AUTO Setting. Set the floor at the reciprocal of your focal length or faster, and the camera will raise the ISO instead of slowing the shutter past the limit.
Can you use aperture priority in low light?
Yes, and it’s often the right choice. Pair it with Auto-ISO, a minimum shutter speed floor, and a sensible ISO ceiling (12,800 is the usable upper limit on most current full-frame bodies). In low-light streets, pub interiors, or museums, aperture priority at f/2.8 or f/4 with Auto-ISO will hold the shutter fast enough for a sharp hand-held shot while letting the ISO climb to compensate. Modern noise-reduction in raw processing handles the higher ISO comfortably.
What is the best aperture for landscape travel photography?
f/8 to f/11 for most landscapes. That range gives you deep depth of field front-to-back without crossing into diffraction territory. Go wider (f/5.6) if you want some softness in the very far background, narrower (f/13 or f/16) only if you’re working with very close foreground elements and need extra depth. Past f/16 on a full-frame body, diffraction softens the whole image faster than depth of field hardens it; on smaller sensors, that point arrives earlier (around f/11 on micro four thirds).
Keep Going
Aperture priority is the single highest-leverage setting on your camera, and the fastest way to move from photographs that disappoint you to ones you’re proud to print. Set it, pair it with Auto-ISO and a minimum shutter speed, learn to use exposure compensation as a reflex, and you’ll have closed the gap between the photo you saw and the photo you ended up with.
If you’d like to go deeper, on lighting and composition and post-processing and the things that turn a technically correct photo into one you’d hang on a wall, our Travel Photography online course covers all of it. It draws on what I’ve learned across 30 years of professional travel work, and it’s the most direct way I know to keep improving between trips.
For more on the related camera basics, our guide to the exposure triangle covers aperture, shutter speed, and ISO in detail, and our guide to RAW explains why every serious travel photographer shoots raw rather than JPEG. If you’re working on a mirrorless body, our beginners’ guide to mirrorless walks through every setting worth changing out of the box, and our DSLR beginners’ guide does the same for older bodies. For scene-specific guides, our notes on landscape photography and photographing sunrise and sunset both lean heavily on the aperture priority workflow described here.